 Save
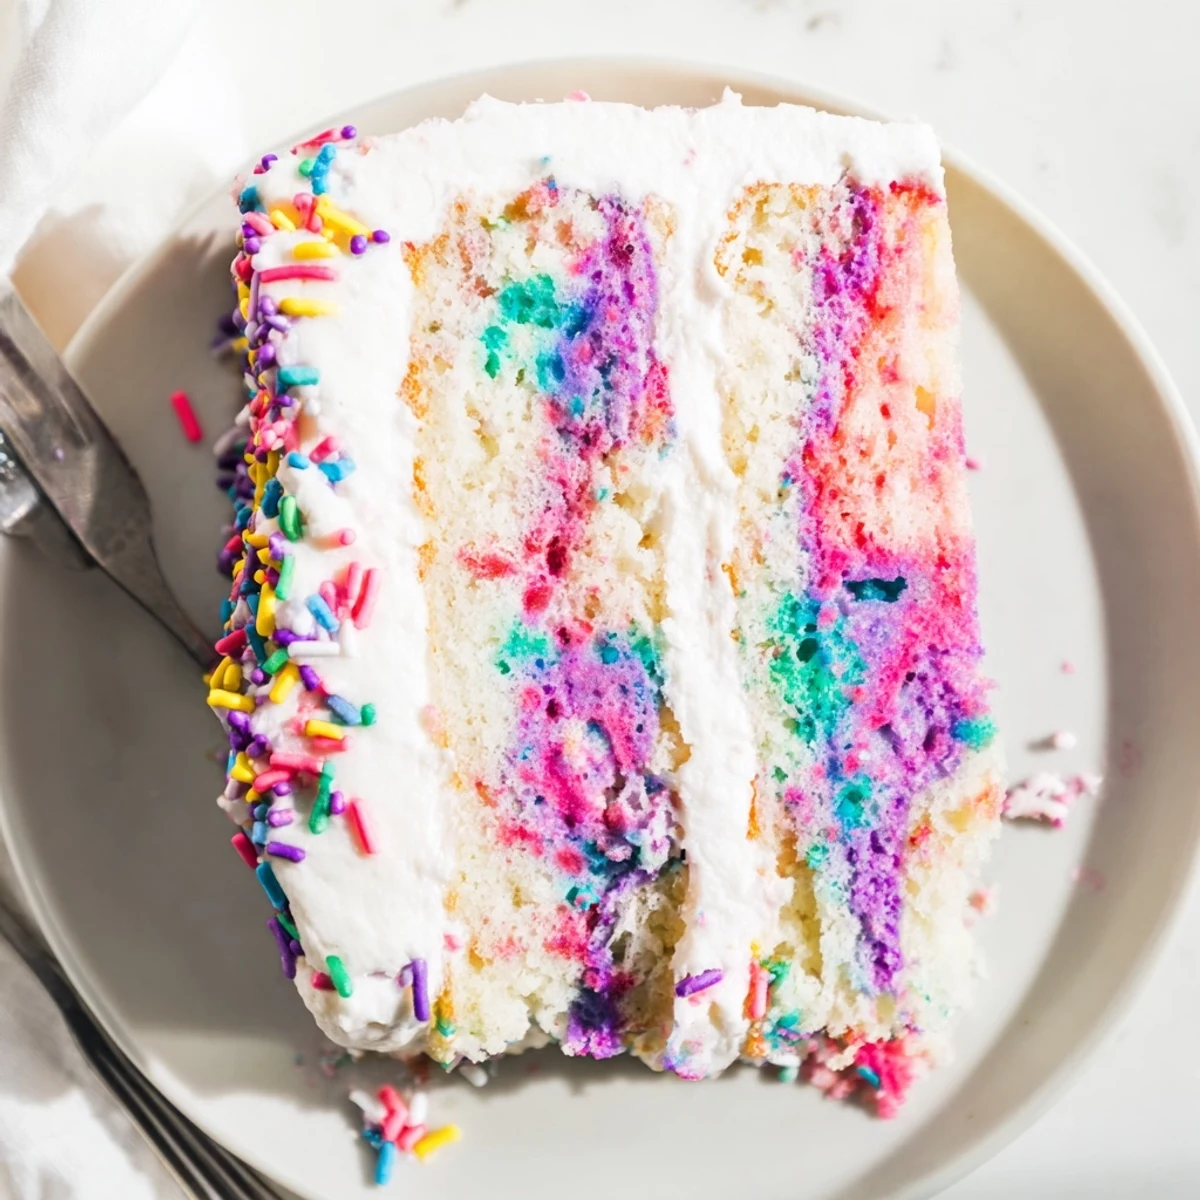
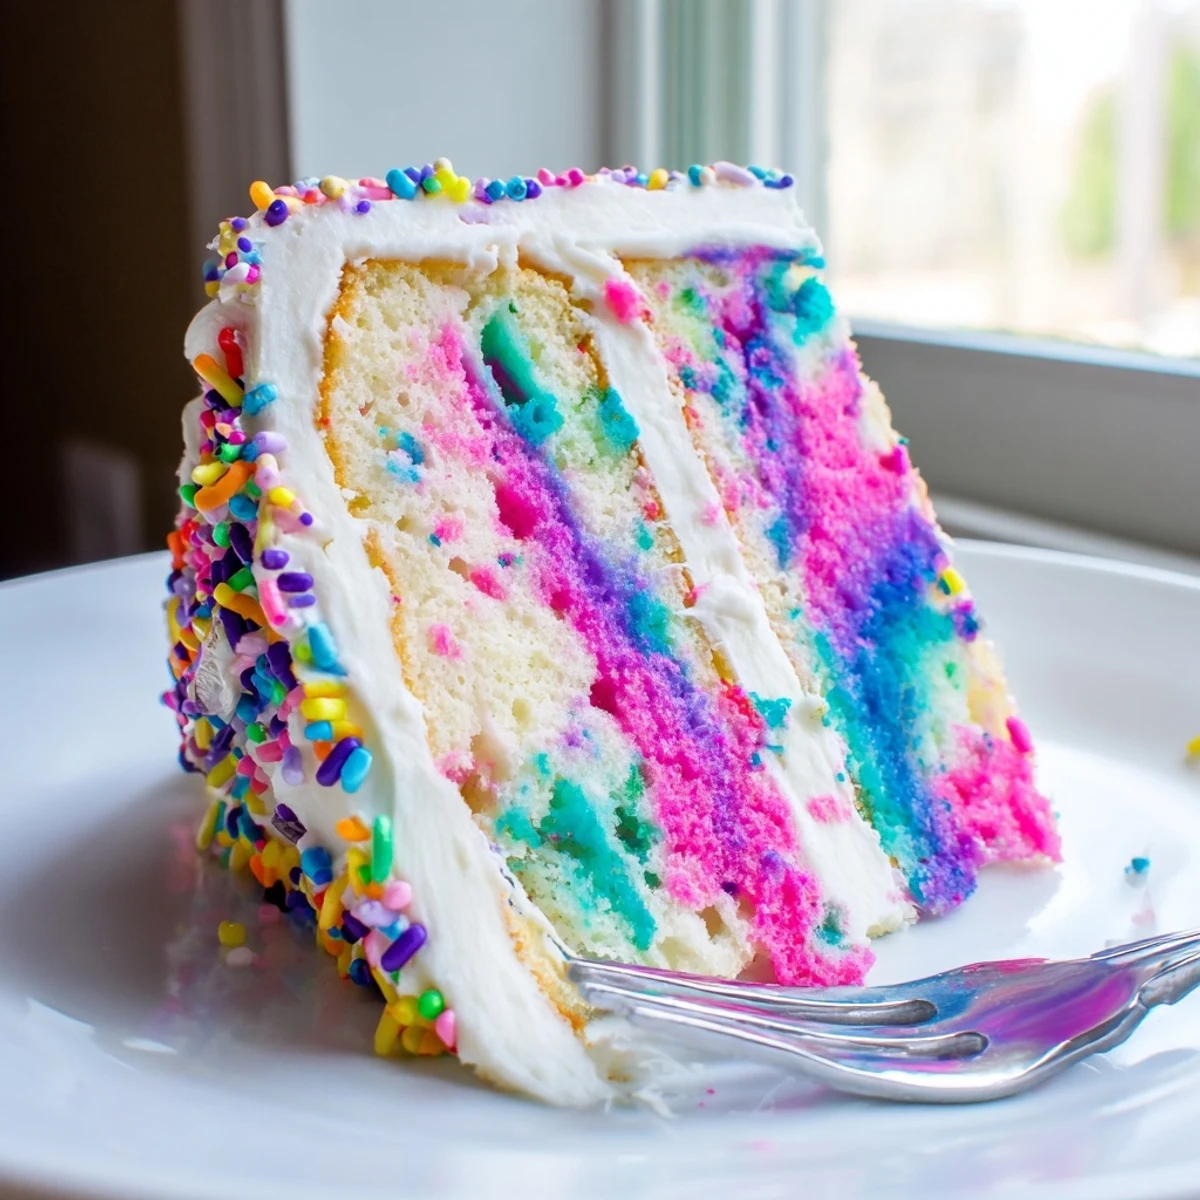
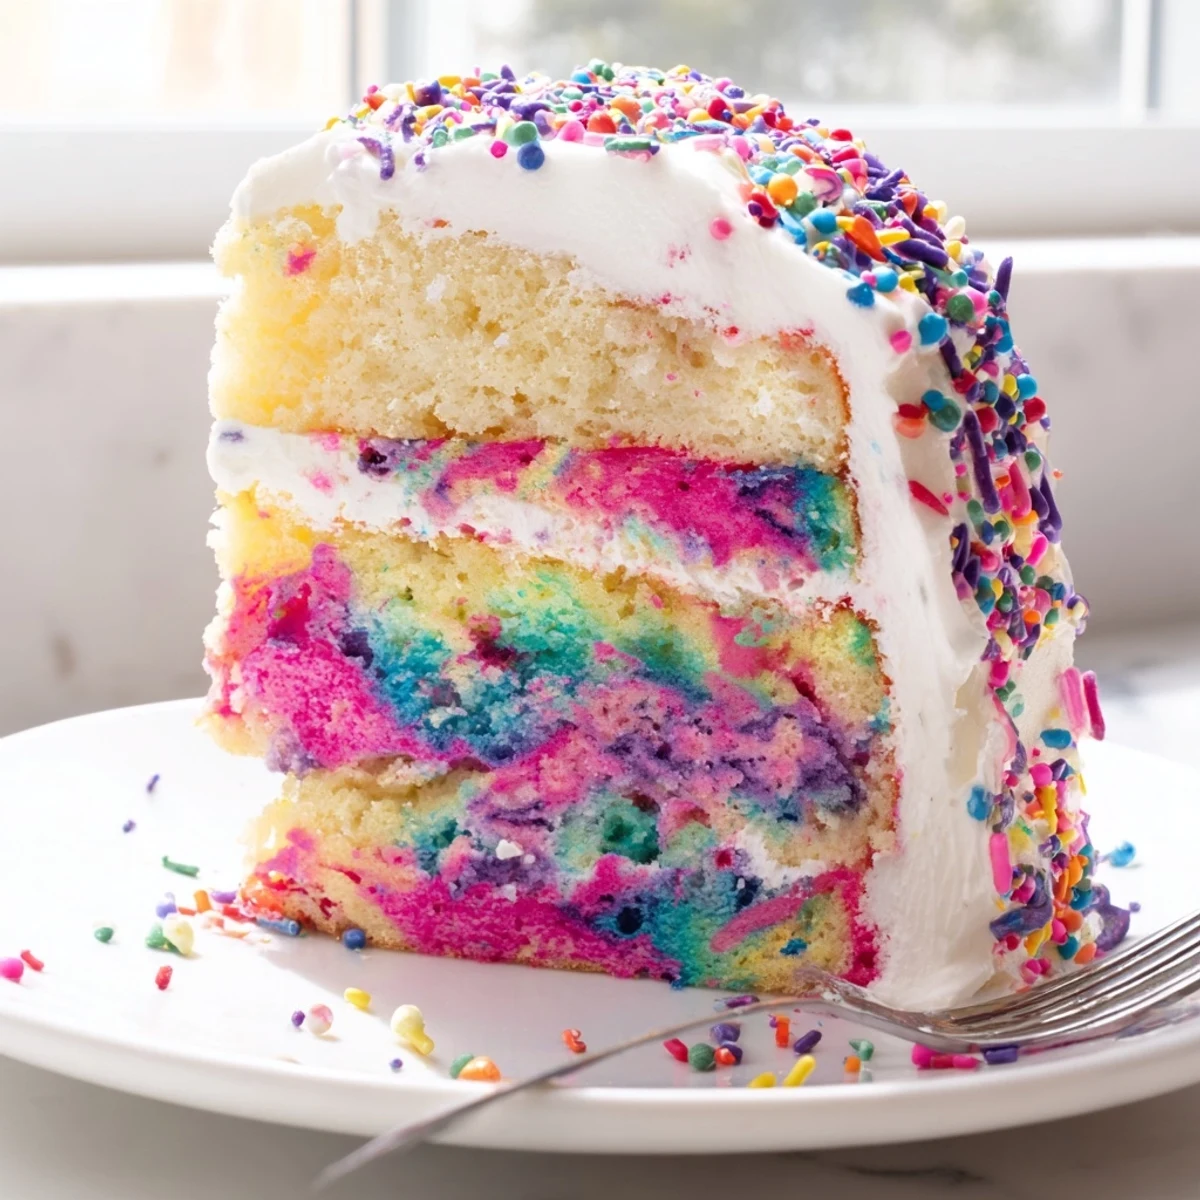
Save Transform a simple confetti cake into a magical unicorn-themed masterpiece. This vibrant dessert combines moist vanilla cake with colorful pudding-filled pockets, creating a stunning rainbow effect throughout. The fluffy whipped topping and sprinkles add the perfect finishing touch.
Ideal for birthday celebrations, parties, or any occasion needing a touch of whimsy. The preparation is straightforward—bake the cake, create holes, fill with colored pudding, and top with whipped cream. The result is both visually impressive and delicious.
The first time I made this for my niece's birthday, she actually gasped when we cut into it. The rainbow pudding hiding inside the cake looked like pure magic, and suddenly I was the coolest aunt ever. Now it is my go-to whenever I need to bring something that makes people smile before they even take a bite.
Last summer I made three of these cakes for different occasions, and each time someone asked me for the recipe while still chewing their first bite. My neighbor now requests it for every block party, and I have learned to double the sprinkles because people fight over the pieces with the most decorations.
Ingredients
- Boxed funfetti or vanilla cake mix: Using a mix keeps this simple while still being delicious, but the real secret is following the box directions exactly for the fluffiest texture
- Required mix ingredients: Usually eggs, oil, and water—grab exactly what your specific box calls for to avoid any mishaps
- Instant vanilla pudding mix: Do not accidentally buy cook-and-serve pudding; instant is crucial here because it sets up beautifully in those holes
- Cold milk: Cold milk helps the instant pudding thicken properly, so measure it out before you start mixing
- Gel food coloring: Gel gives you those vibrant, true unicorn colors without thinning out your pudding like liquid colors can
- Whipped topping: Let it thaw completely in the fridge before spreading, or you will end up with torn cake and frustrated spreading attempts
- Colorful sprinkles: These are not optional—the more sprinkles, the more magic, so be generous with your rainbow confetti
Instructions
- Preheat and prep your pan:
- Get your oven to 350°F and generously spray a 9x13-inch pan with non-stick spray, paying special attention to the corners
- Bake the cake base:
- Mix your cake batter exactly as the box directs and pour it into your prepared pan, then bake for 25 to 30 minutes until a toothpick comes out clean
- Let it cool briefly:
- Remove from the oven and walk away for 10 minutes—you want the cake warm but not hot, or the pudding will not set properly
- Make the magic holes:
- Use the handle end of a wooden spoon to poke holes every 1 to 2 inches across the entire cake, pressing down gently but firmly through to the bottom
- Whisk up the pudding base:
- In a large bowl, whisk both pudding packages with the cold milk for about 2 minutes until it starts to thicken slightly
- Create your rainbow colors:
- Divide the pudding between four bowls and tint each with a different gel food color, mixing until you have vibrant pink, purple, blue, and yellow
- Fill with hidden color:
- Spoon the different colored puddings randomly into the holes, and do not worry if it looks messy—that is part of the charm
- Add the fluffy cloud layer:
- Spread your thawed whipped topping evenly over the entire cake, covering all those colorful holes completely
- Make it sparkle:
- Sprinkle your unicorn or confetti sprinkles generously over the top while the whipped topping is still slightly sticky
- Chill and reveal the magic:
- Refrigerate for at least 1 hour before slicing, then watch faces light up when the rainbow inside gets revealed
 Save
Save This recipe has become my secret weapon for those moments when someone needs a little extra joy in their day. There is something incredibly satisfying about serving a dessert that looks so fun and whimsical, and watching the rainbow appear inside never gets old no matter how many times I make it.
Making It Your Own
Sometimes I switch up the color palette to match holidays or birthdays, but the pink-purple-blue-yellow combination is still my favorite for that classic unicorn vibe. You could also use different cake flavors—chocolate with neon pudding creates a stunning contrast.
Getting The Colors Right
I have learned that a tiny drop of gel coloring goes a long way, so start with less and add more as needed. Mixing the colors in separate small bowls rather than coloring the whole pudding at once gives you more control and keeps the colors distinct and vibrant.
Serving And Storing
This cake actually tastes better after sitting overnight, as the pudding has time to really soak into the cake layers and create that incredibly moist texture. I like to make it the evening before a party and let it chill until serving time.
- Use a sharp knife wiped clean between slices for the prettiest presentation
- Leftovers keep well covered in the fridge for 2 to 3 days, though the sprinkles might start to bleed slightly
- Bring the cake to room temperature for about 15 minutes before serving for the best flavor and texture
 Save
Save Every time I serve this cake, someone tells me it reminded them of being a kid again. That simple joy is exactly why baking feels so special.
Common Questions
- → How far in advance can I make this?
-
This dessert tastes best when made the same day, but you can prepare it up to 24 hours in advance. Store covered in the refrigerator. The cake may become slightly softer over time due to the pudding absorption.
- → Can I use homemade cake instead of boxed mix?
-
Absolutely. Any white or vanilla cake recipe works wonderfully. Just ensure it's baked in a 9x13-inch pan and still warm when poking holes for optimal pudding absorption.
- → What's the best way to achieve vibrant colors?
-
Use gel food coloring rather than liquid for the most intense hues. Start with a small amount and add more until reaching your desired brightness. The colors will appear even more vibrant once chilled.
- → Can I make this dairy-free?
-
Yes. Use plant-based milk alternatives and dairy-free whipped topping. Many vanilla cake mixes can be prepared with egg replacements and plant milk. Always check ingredient labels carefully.
- → Should the cake be warm or cool when poking?
-
Let the cake cool for about 10 minutes after baking. It should be warm but not hot—this helps the pudding absorb while maintaining the cake's structure. Too hot, and the pudding may become too thin.
- → How do I get clean slices?
-
Chill the completed cake for at least the recommended hour, though longer is better. Run your knife under warm water and wipe clean between cuts. This ensures neat, presentable servings.
