 Save
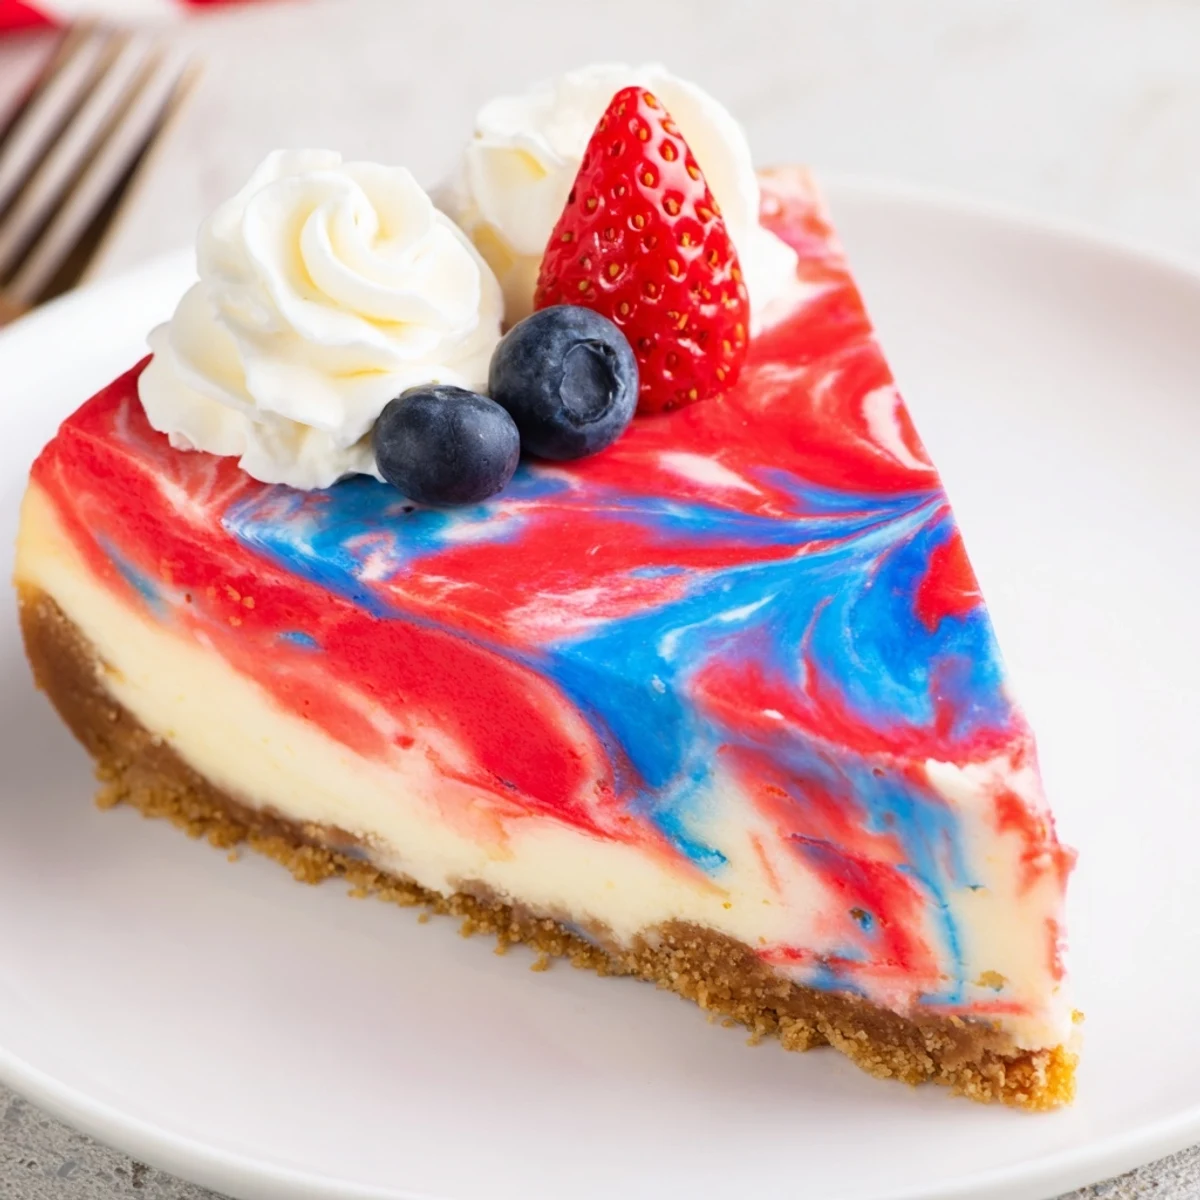
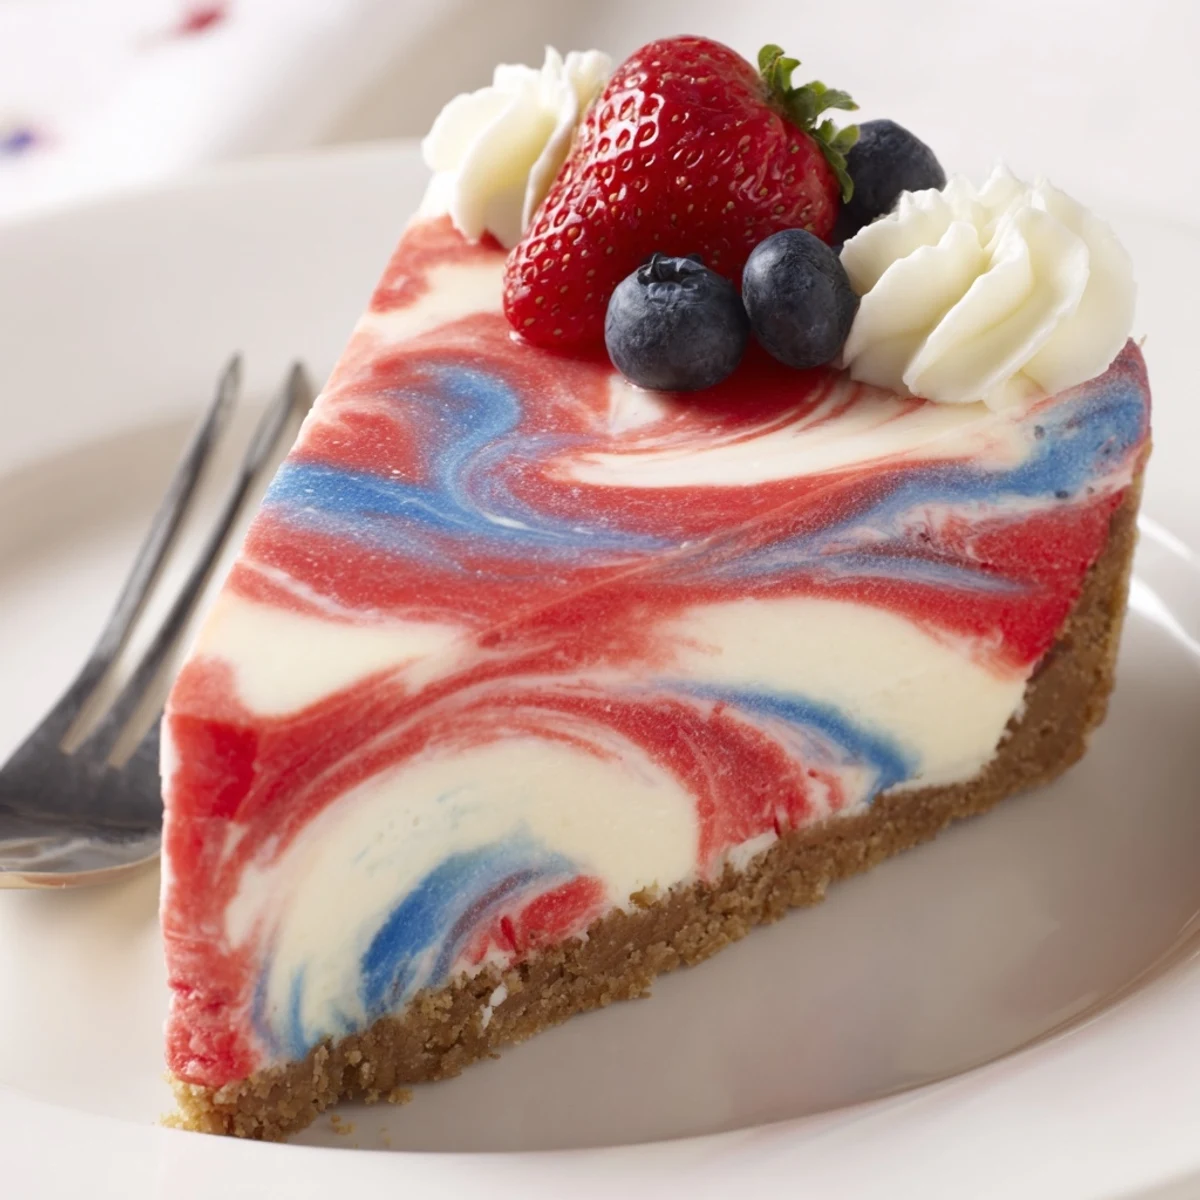
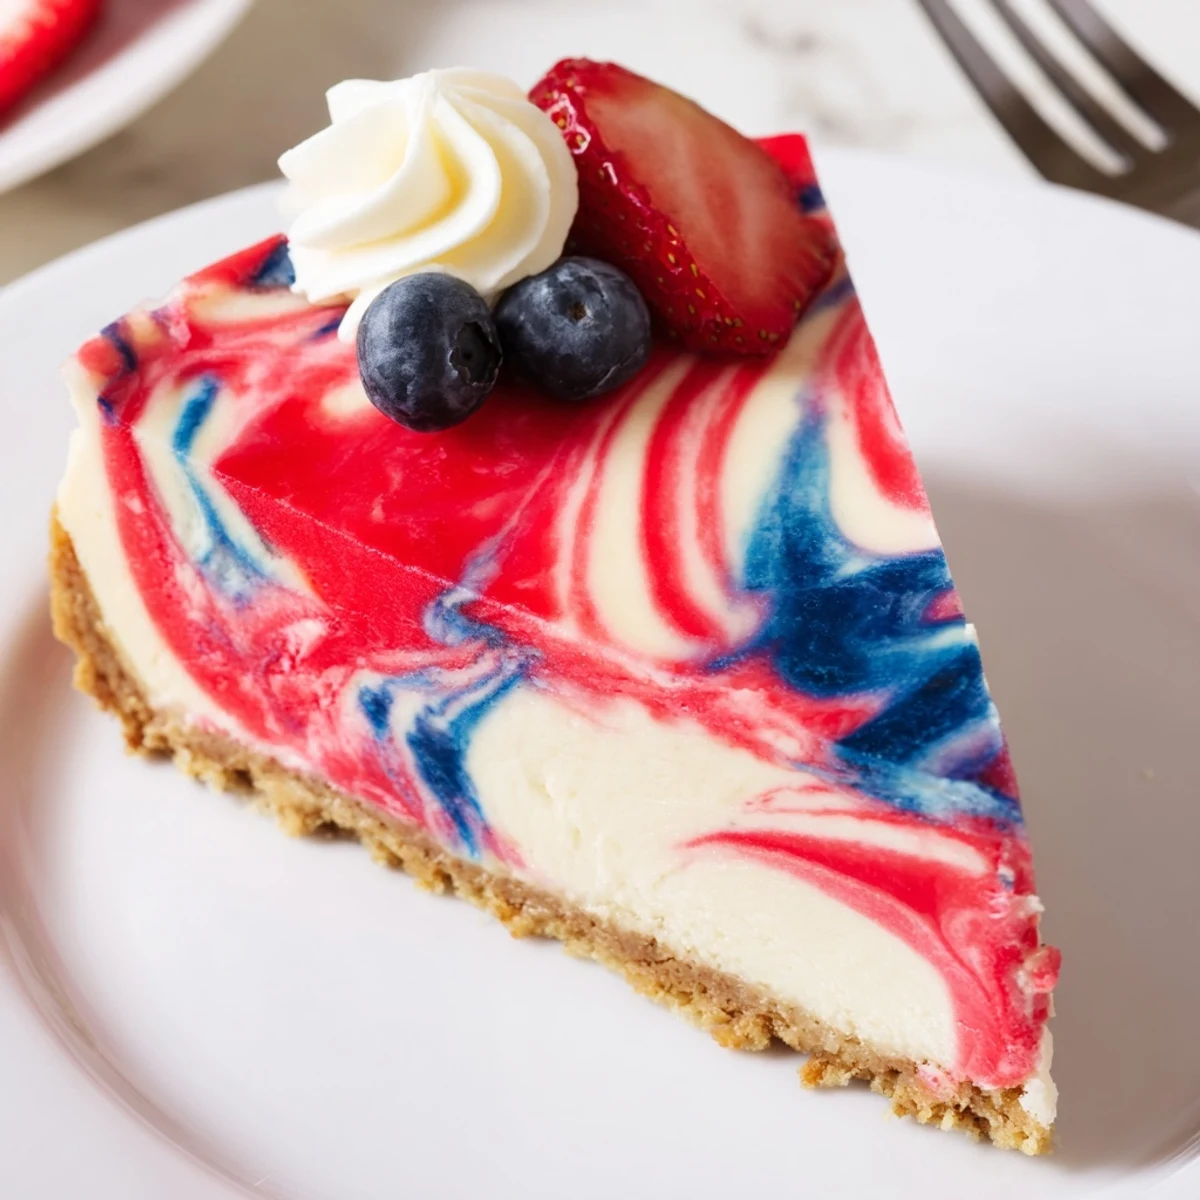
Save Preheat oven to 325°F. Press a graham cracker crust and parbake until set. Beat softened cream cheese with sugar and vanilla, add eggs one at a time, then fold in sour cream and flour. Divide batter into three portions; tint two with gel colors. Alternate spoonfuls on the cooled crust and gently swirl with a skewer—avoid overmixing. Bake until center is just set, cool in the oven with the door ajar, then chill at least 3 hours before slicing. For brighter swirls use gel dye and finish with whipped cream or fresh berries if desired.
The first time I made this Patriotic Swirl Cheesecake, I accidentally left streaks of food coloring across my kitchen counters and giggled at my hands turning patriotic as well. There’s something infectious about swirling those vibrant colors into creamy cheesecake batter—it's almost impossible not to smile. The sweet, buttery scent from the crust fills the air just before the doors swing open and family tumble in, asking what that delicious smell could be. The finished cake always looks like a party, no matter the weather outside.
One Fourth of July, I brought this cheesecake to a block party hoping it would look as festive as I imagined, only to have my neighbor ask, &Did you really make this?& I watched as the kids joyfully argued over the slice with the best swirl, while someone tried to figure out how I’d managed to get such bright colors without a mess—spoiler: there was definitely a mess. Still, every crumb vanished by sunset, so I knew this recipe had earned its place in my celebration lineup.
Ingredients
- Graham cracker crumbs: The base of every classic cheesecake—press firmly for a crust that holds together.
- Granulated sugar: Sweetens both the crust and the filling; remember to measure with a gentle hand for balance.
- Unsalted butter, melted: Binding and richness for the crust, and melting it fully stops dry spots from hiding underneath.
- Pinch of salt: Heightens the flavors and brings the crust alive, never skip it.
- Cream cheese, softened: It should sit out before mixing for ultimate smoothness; cold cream cheese leads to lumps.
- Vanilla extract: Real vanilla makes the filling sing—if you splash a drop on your wrist, it should smell warm and fragrant.
- Large eggs: Blend in one at a time to avoid overbeating; they give the filling its delicate structure.
- Sour cream: Adds tang and keeps the cheesecake extra creamy; use full fat if you can for the best texture.
- All-purpose flour: Just enough to add stability so the cake slices beautifully every time.
- Red gel food coloring: Gel makes brighter streaks without making the filling runny—go easy and stir gently.
- Blue gel food coloring: Same tip as above—start with less, build up, and let the color magic happen.
Instructions
- Get Ready:
- Preheat your oven to 325°F and grease a 9-inch springform pan, letting the parchment paper snuggle up along the bottom.
- Mix and Press:
- Stir together graham crumbs, sugar, salt, and melted butter—your hands will love the buttery squish. Press the mixture across the pan’s base, making it as even as you can, and bake for 10 minutes until golden to the nose.
- Whip the Filling:
- Beat the softened cream cheese until it turns fluffy and strain out every last lump. Pour in sugar and vanilla, letting the beaters hum, before cracking in the eggs one at a time—each should disappear before the next joins the bowl.
- Smooth and Divide:
- Fold in the sour cream and flour gently until the mix is dreamy and smooth. Ladle the batter evenly into three bowls; keep one plain, disguise the others in swirls of red or blue gel coloring, working up to your preferred groovy brightness.
- The Swirl Show:
- Drop spoonfuls of each batter onto your cooled crust, patching together their playful colors. Use a skewer or tip of a knife—just once or twice—to swirl the hues into a marbled masterpiece, but hold back from overdoing it.
- Bake and Relax:
- Pop the pan into the oven and let it bake for 50–60 minutes, until the center has the tiniest wobble. Leave the oven door ajar and let the cake cool slowly inside for another hour; this keeps cracks at bay.
- Chill Out:
- Transfer the pan to the fridge for at least 3 hours, preferably overnight if you have the willpower. When ready to serve, carefully slide a knife along the sides before releasing the springform—you’ll unveil those perfect swirls ready for slicing.
 Save
Save There was an afternoon when my niece, hands sticky with leftover batter, declared this &the most fun cake in the whole house&—and considering the menu that summer, that’s saying something. We took turns swirling, and every swirl turned into a small, edible masterpiece. It’s the kind of activity that brings out both the perfectionist and the playful side in everyone, creating memories you can taste with every bite.
A Few Words on Marbling
I used to overthink the marbling, aiming for perfect symmetry, but quickly realized the charms come from unpredictability. The cakes that looked a bit wild were always the ones everyone wanted a photo of. Swirling is forgiving—just draw a few lazy S’s through the batter, then step away and trust the oven to do the rest.
Solutions for Sinkage and Cracking
If you’ve ever peeked into the oven and seen a fissure forming, you’re not alone. Letting the cheesecake cool gradually in the oven helps prevent those cracks, and making sure not to overbake keeps it velvety all the way through. Don’t worry if it’s a little jiggly; that’s the trick for creamy slices.
Toppings, Extras, and Personal Touches
Adorning the cooled cheesecake with piped whipped cream and a scatter of fresh berries takes this dessert straight from festive to unforgettable. I’ve even seen rainbow sprinkles pop up on some slices when the kids get their hands on them. If you like a tangy contrast, a drizzle of lemon zest or a dollop of plain Greek yogurt can make each bite sparkle.
- Let the cake come close to room temp before slicing for cleaner cuts.
- If you live somewhere hot, chill your mixing bowl to keep the filling smooth.
- Never skip lining the bottom of the pan, or you might lose half your crust.
 Save
Save Whether you’re celebrating big or keeping things low-key, this cheesecake transforms any occasion into something memorable. The swirls might be a little different each time, but that’s the perfect excuse to come back for another slice.
Common Questions
- → How can I prevent the filling from cracking?
-
Beat the cream cheese until smooth and avoid overmixing once eggs are added. Bake at moderate temperature and cool gradually—leaving the oven door cracked for an hour helps prevent sudden temperature shifts that cause cracks.
- → Why use gel food coloring instead of liquid dyes?
-
Gel colors add intense, vibrant hues without thinning the batter. Liquid dyes can alter batter consistency and dilute color, making swirls less distinct.
- → How do I know when it's done baking?
-
The center should be just set but still slightly jiggly when gently shaken. Edges will look firmer; residual heat will finish the setting during the cooling period.
- → What's the best technique for creating distinct swirls?
-
Layer spoonfuls of plain, red, and blue batter onto the crust in alternating patches. Use a skewer or knife to make a few gentle figure-eight swirls—too many passes will blend the colors.
- → How should I store and slice the cake?
-
Chill at least three hours, preferably overnight, for clean slices. Store covered in the refrigerator for up to 4–5 days. Wipe a warm knife between cuts for neater portions.
- → Can I make substitutions for the crust or dietary needs?
-
Swap graham crackers for gluten-free crumbs or crushed cookies for different flavors. Note the filling contains dairy and eggs—use suitable alternatives if avoiding those allergens.
