 Save
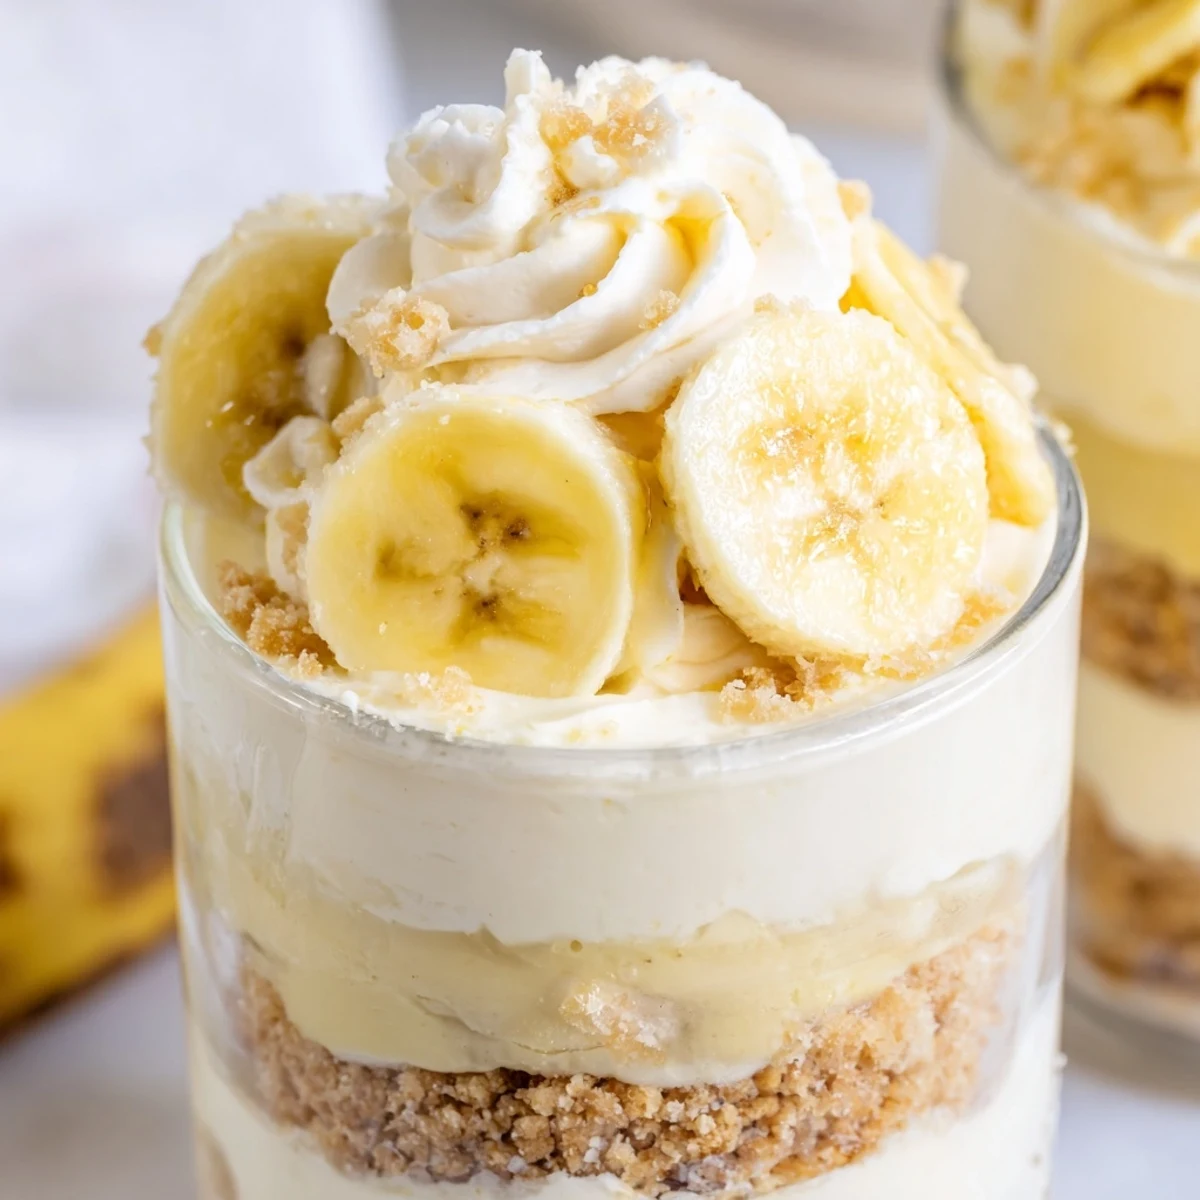
Save These individual cups feature irresistible layers starting with a buttery vanilla wafer crust pressed into the bottom. A velvety cheesecake filling made from cream cheese, sugar, and freshly whipped cream creates the perfect creamy base. The classic banana pudding layer, made with instant mix and cold milk, adds nostalgic flavor and smooth texture. Fresh sliced bananas throughout provide natural sweetness and fruity contrast. Each cup is finished with a crown of additional cheesecake mixture, sprinkled with crunchy wafer crumbs and topped with fresh banana slices. The entire assembly requires only 20 minutes of active preparation before chilling for at least two hours to set. These portable portions are ideal for gatherings, potlucks, or whenever you crave something sweet without turning on the oven.
My sister hosted a summer barbecue last year and asked me to bring dessert, but her oven had died two days before. I panicked until I remembered my grandmother's banana pudding trick—no heat required, just patience and a good spoon. These cups ended up stealing the show, with people hovering around the dessert table like it was a buffet.
I made these again for my book club and watched my friend Sarah practically lick her cup clean. She asked for the recipe before she even finished, which is always the best compliment. Something about individual servings makes people feel special, like you put extra thought just for them.
Ingredients
- Vanilla wafer cookies: Crushing these yourself creates irregular crumbs that settle beautifully into the crust, and the slight variation in size gives better texture than uniform store bought crumbs
- Unsalted butter: Melted just until it turns to liquid, this binds the crumbs without making them soggy—the key is pressing gently so the crust holds together but stays tender
- Cream cheese: Must be truly soft to room temperature, or you will end up with tiny lumps that no amount of mixing can fix, and nobody wants lumpy cheesecake
- Heavy whipping cream: Cold straight from the fridge is nonnegotiable here—warm cream will not whip properly no matter how long you beat it
- Instant banana pudding mix: The instant variety works perfectly for this layered dessert, giving you that unmistakable artificial banana flavor that somehow tastes like childhood
- Ripe bananas: Look for bananas with some brown spots on the peel—they are sweeter and mash better, though you are slicing them here so texture matters less than flavor
Instructions
- Build the buttery crumble base:
- Mix the crushed wafers with melted butter until every piece feels lightly coated, then press about two tablespoons into each cup with the back of a spoon—just enough to create a foundation that will not crumble when you bite into it.
- Whip up the cheesecake clouds:
- Beat the softened cream cheese with sugar and vanilla until it is smooth and satiny, then fold in whipped cream until the mixture feels light enough to float, like eating a sweet cloud.
- Prepare the pudding layer:
- Whisk the pudding mix with cold milk for exactly two minutes until it thickens into something spoonable but not too stiff—it needs to flow easily between the other layers.
- Assemble the parfait magic:
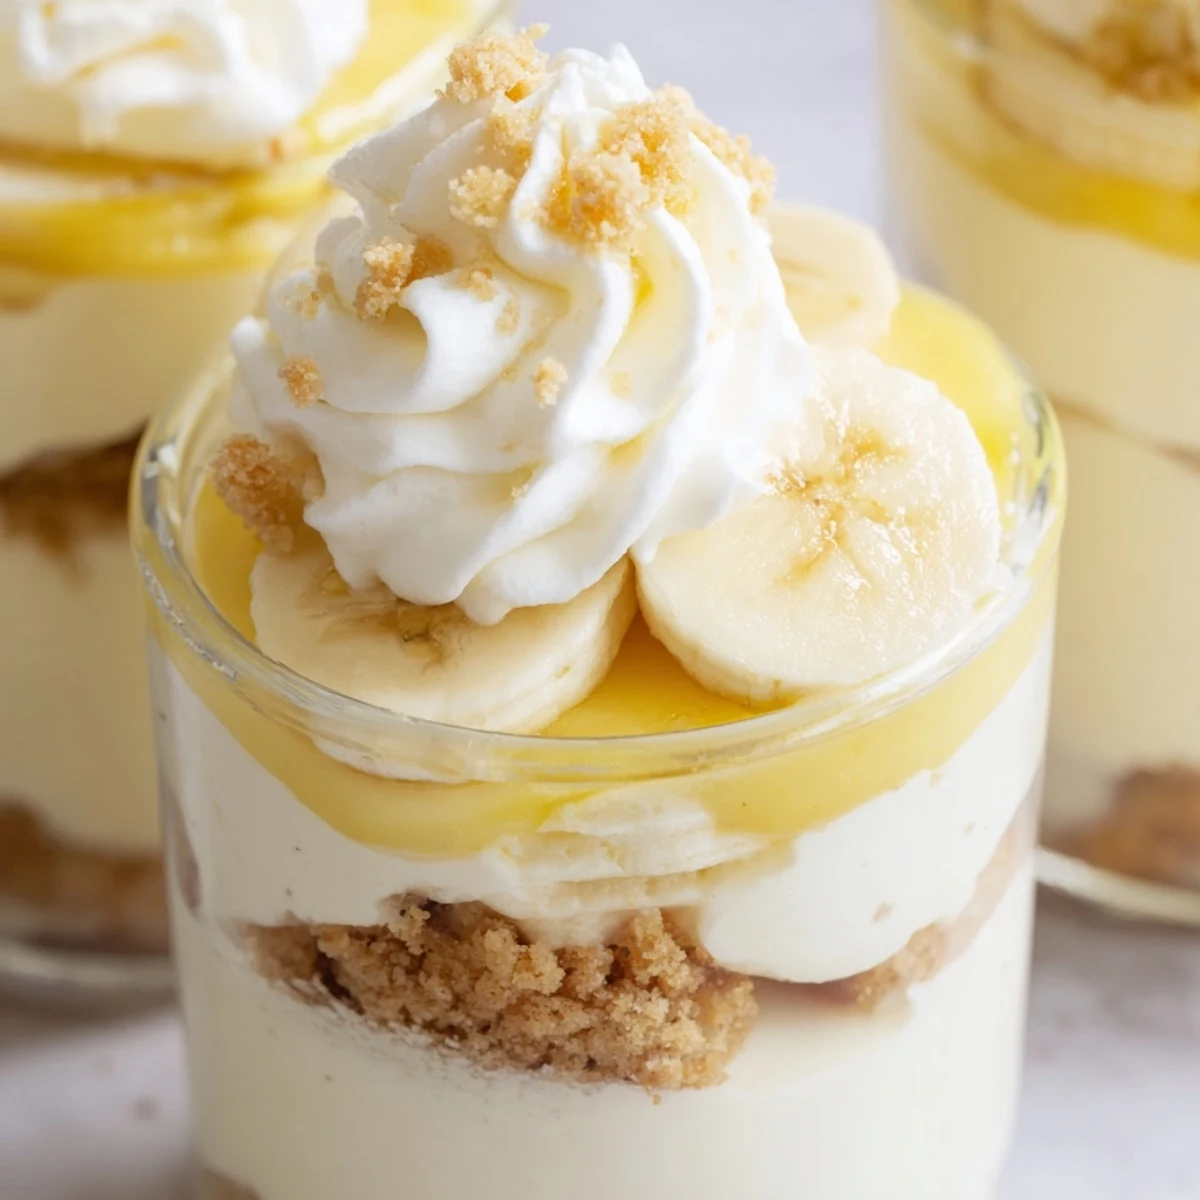
- Layer half the cheesecake mixture over the crust, add sliced bananas, spoon the pudding on top, and finish with remaining cheesecake mixture—each cup should show beautiful stripes through the glass.
- Add the finishing touches:
- Sprinkle extra wafer crumbs on top, add fresh banana slices, and add a dollop of whipped cream if you want to make it look fancy, then let everything get friendly in the fridge for at least two hours.
 Save
Save My nephew usually complains about banana anything, but he tried these at the barbecue and asked if I could make them for his birthday instead of cake. Sometimes the simplest desserts are the ones that stick in people's memories.
Make Ahead Magic
You can assemble these cups up to 24 hours ahead, which is practically a miracle for entertaining. Just keep the banana slices and fresh toppings separate until the last minute so everything looks fresh and vibrant.
Serving Size Secrets
Small juice glasses or mason jars work perfectly because the layers look so impressive against clear glass. I have found that six to eight ounce cups are ideal—big enough to feel substantial but small enough that nobody feels too guilty about seconds.
Flavor Twists
My cousin added a teaspoon of cinnamon to the crust mixture one year and it was such a game changer I have never gone back. The warmth of the spice plays beautifully with the sweet banana flavor and makes everything taste more sophisticated somehow.
- Try crumbling graham crackers instead of vanilla wafers for a nuttier base
- Add a splash of banana liqueur to the cheesecake mixture for an adults only version
- Toast the wafer crumbs in a dry pan before sprinkling on top for extra crunch
 Save
Save These little cups have become my go to for every potluck and gathering because they travel well and always disappear first. Sometimes the simplest desserts create the biggest memories.
Common Questions
- → How long do these cups need to chill before serving?
-
The cups require at least 2 hours of refrigeration time to properly set. This chilling period allows the cheesecake filling and banana pudding layers to firm up, making them easier to serve and ensuring the best texture. For optimal results, you can prepare them up to 24 hours in advance, though add fresh banana toppings just before serving to prevent browning.
- → Can I make these cups ahead of time for a party?
-
Absolutely! These cups are perfect for advance preparation. You can assemble the entire cups, except for the fresh banana toppings, up to 24 hours before serving. Store them covered in the refrigerator. Add fresh banana slices and any additional whipped cream just before serving to maintain the best appearance and prevent the bananas from oxidizing.
- → What type of serving cups work best for this dessert?
-
Clear glass dessert cups, small mason jars, or parfait glasses work beautifully as they allow you to see the attractive layers. Each cup should hold approximately 6-8 ounces. You'll need six individual containers. The transparent vessels showcase the creamy cheesecake, yellow banana pudding, and fresh fruit layers, making for an impressive presentation.
- → How do I prevent the banana slices from turning brown?
-
To keep bananas looking fresh, toss the slices lightly in lemon juice before layering them in the cups. The citric acid prevents oxidation and browning. Alternatively, add fresh banana toppings immediately before serving rather than hours in advance. The interior banana layers are somewhat protected by the creamy fillings, but surface slices are more susceptible to browning.
- → Can I substitute the vanilla wafers with another cookie?
-
Yes, graham crackers crushed into crumbs make an excellent substitute for vanilla wafers in the crust. Digestive biscuits, Nilla wafers, or even shortbread cookies can work well. The key is achieving that sandy, crumbly texture that binds with melted butter. Each alternative will impart slightly different flavor notes to the final dessert.
- → Is there a way to make this dessert lighter?
-
You can reduce calories by using low-fat cream cheese and light whipped topping instead of heavy whipping cream. Substituting part of the cream cheese with Greek yogurt adds protein while maintaining creaminess. However, keep in mind that these modifications may slightly alter the rich, velvety texture that makes this dessert so indulgent.
