 Save
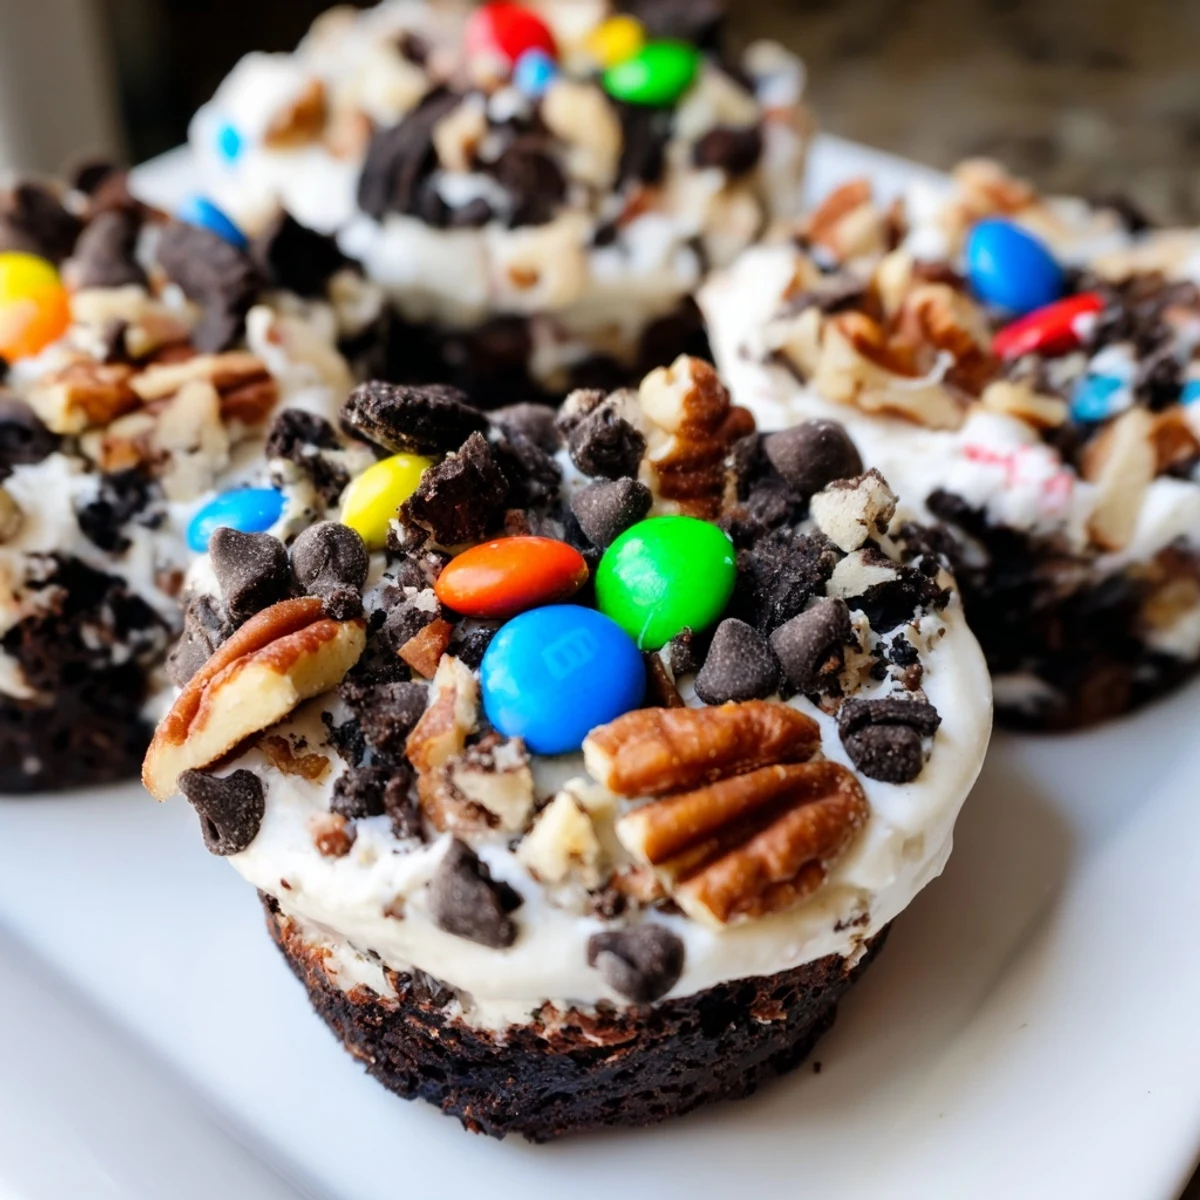
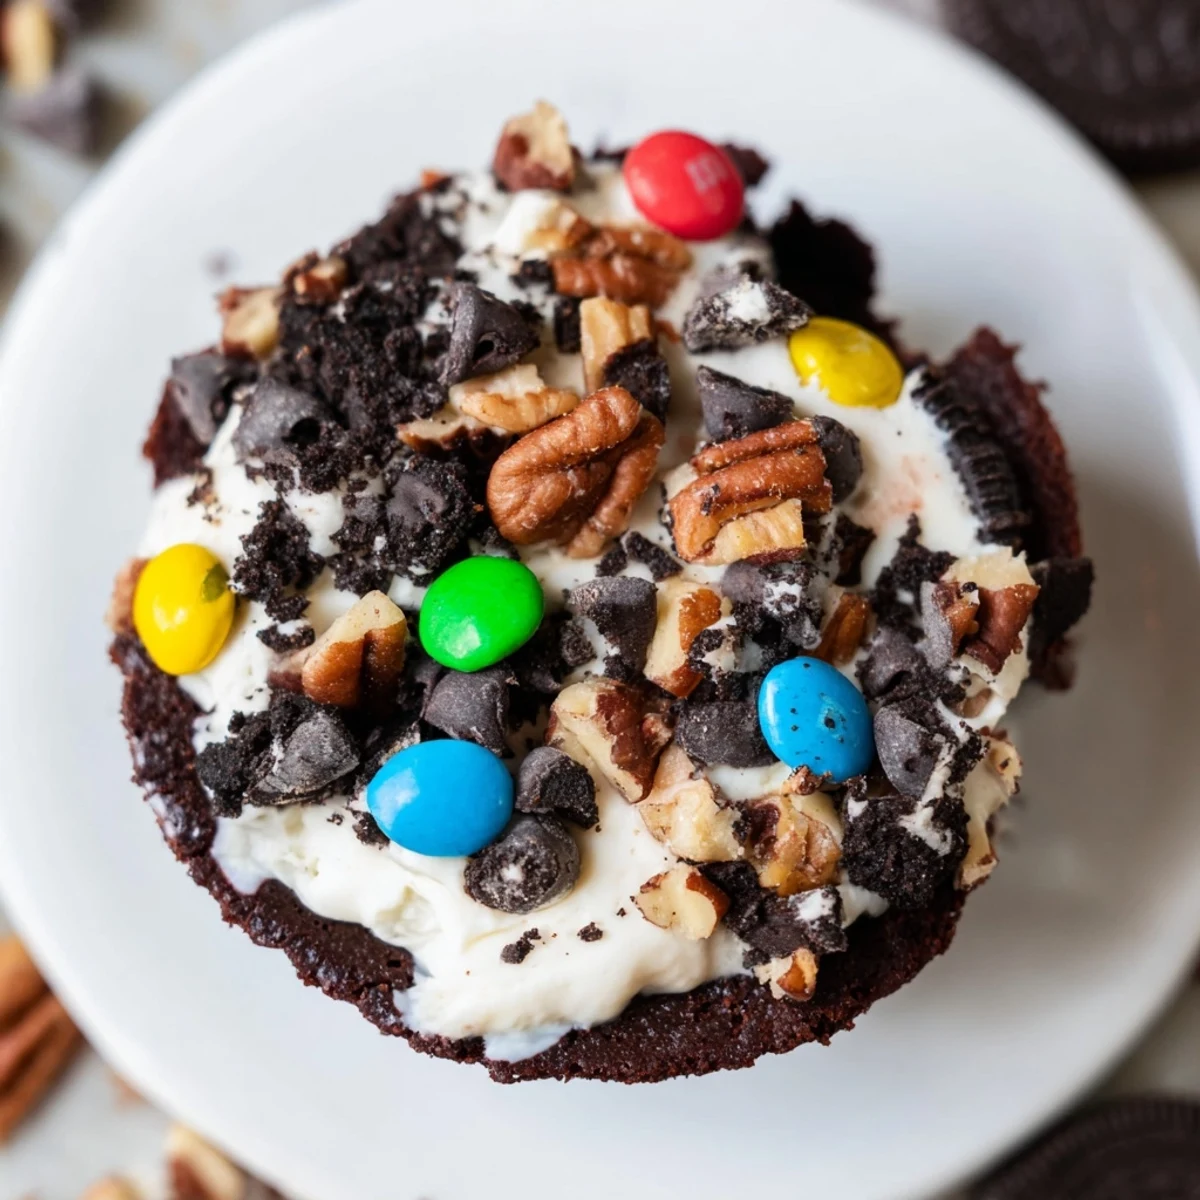
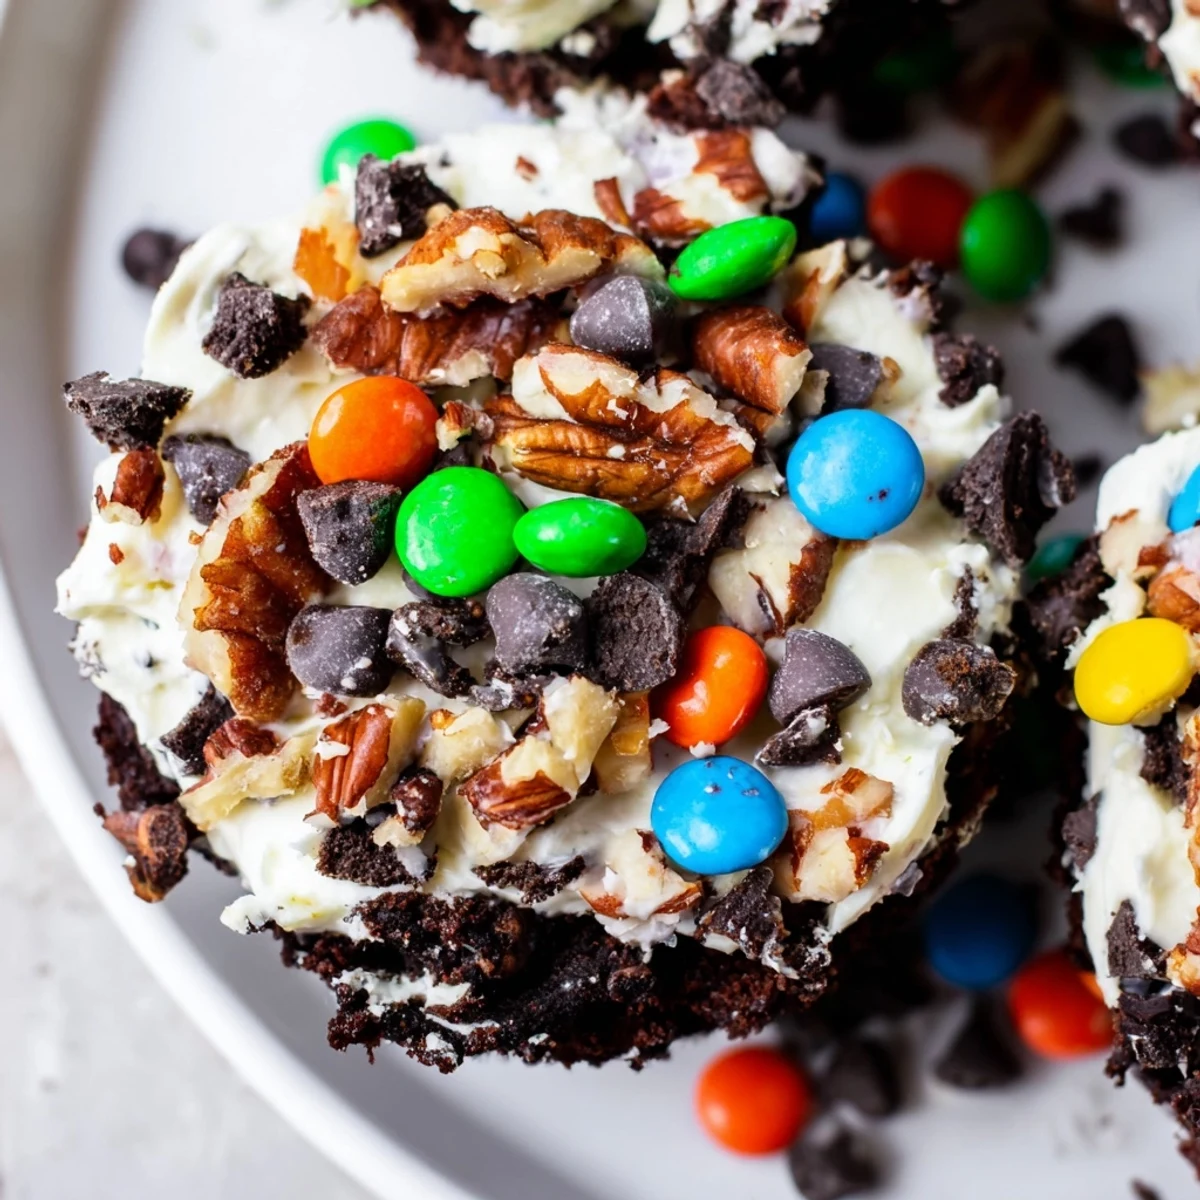
Save These indulgent brownie cheesecake cups combine the best of both worlds—a rich, fudgy chocolate base topped with silky smooth cheesecake filling. The magic happens in the final layer, where each cup gets generously loaded with mini chocolate chips, crunchy pecans or walnuts, crushed Oreos, and colorful mini M&Ms.
The muffin tin format makes these perfectly portioned for parties, gatherings, or whenever you need an impressive dessert that looks as good as it tastes. With just 50 minutes from start to finish, you'll have 12 decadent treats that strike the perfect balance between dense chocolate brownie and light, tangy cheesecake.
For the best texture, let them chill for at least an hour before serving—this allows the cheesecake layer to set completely and the flavors to meld together beautifully.
The first time I made these, my brother walked into the kitchen and asked why I was putting cheesecake on top of brownie batter. He stopped asking questions after his first bite. Now he requests them for every birthday, and I have to double the recipe because these disappear faster than I can line the muffin tin.
I brought a batch to a potluck last summer and watched three different people ask for the recipe within ten minutes of each other. My friend Sarah actually hid two in her purse before leaving because she wanted her husband to try them. That is when I knew these werent just another dessert.
Ingredients
- Unsalted butter: Use room temperature butter for the silkiest brownie texture that still fudges up beautifully
- Granulated and brown sugar: The combination creates that crackly top everyone fights over while keeping the center tender
- Large eggs: Room temperature eggs incorporate better and prevent the cheesecake layer from separating
- Vanilla extract: Do not skimp here because pure vanilla makes the cheesecake flavor sing against the rich chocolate
- Unsweetened cocoa powder: Dutch processed cocoa gives the deepest color and most intense chocolate flavor
- All purpose flour: Just enough to structure the brownie without turning it into cake
- Salt: This tiny pinch makes all the chocolate flavors pop and balances the sweetness
- Cream cheese: Absolutely must be fully softened or you will end up with lumpy cheesecake filling
- Mini chocolate chips: They distribute more evenly than regular chips and melt into delightful pockets
- Chopped pecans or walnuts: Toast them beforehand for a nutty flavor that cuts through the richness
- Crushed Oreos: The cream filling softens slightly while baking creating cookies and cream moments
- Mini M&Ms: They keep their crunch and add the most satisfying pop of color
Instructions
- Preheat your oven with purpose:
- Get that oven to 175°C (350°F) and line your 12 cup muffin tin like you mean it because nothing ruins the moment faster than stuck desserts
- Melt that butter:
- Watch it carefully in the microwave or on the stove then whisk in both sugars until the mixture turns glossy and starts to pull away from the sides of the bowl
- Bring in the eggs:
- Add them one at a time with the vanilla beating thoroughly after each one until everything is smooth and glossy
- Dry ingredients join the party:
- Sift in your cocoa flour and salt then fold everything together just until you no longer see streaks of white flour
- Divide and conquer:
- Drop about one heaping tablespoon of brownie batter into each muffin cup pressing gently to flatten but do not worry about perfection
- Cream cheese magic:
- In a completely separate bowl beat that softened cream cheese until it is completely smooth then add sugar egg and vanilla until the mixture is silky and lump free
- Layer it up:
- Spoon one tablespoon of cheesecake filling over each brownie base and smooth the tops gently with the back of your spoon
- Go wild with toppings:
- Pile on your chosen mix ins pressing them lightly so they stick but do not sink into the cheesecake layer
- Bake until just right:
- Slide them into the oven for 22 to 25 minutes until the cheesecake is set and the brownie edges are firm but the centers still have a slight wobble
- The patience step:
- Cool them in the pan for exactly 10 minutes before transferring to a wire rack then chill for at least one hour because these are infinitely better cold
 Save
Save My daughter helped me make a batch last weekend and decided each cup needed different toppings. The kitchen was covered in sprinkles and crushed cookies but seeing her face when she pulled that tray out of the oven was worth every mess. Sometimes the imperfect ones are the best ones.
Getting The Texture Right
The brownie layer should feel slightly underdone when they come out of the oven because it firms up during chilling. I learned this the hard way after leaving one batch in too long and ending up with dry cups that needed to be rescued with ice cream.
Topping Combinations That Work
Start with about 60 grams total of toppings per cup because too much weight makes the cheesecake sink. My favorite combo is salted pretzels with caramel bits but peanut butter cups and white chocolate chips have their own devoted fans.
Make Ahead Strategy
These actually improve after a night in the refrigerator because the flavors meld together and the texture becomes more fudgy. I have made them up to three days ahead and they were still fantastic.
- Press a piece of plastic wrap directly onto the cheesecake layer before chilling to prevent it from drying out
- Let them sit at room temperature for 15 minutes before serving so the brownie layer softens slightly
- Add fresh toppings like whipped cream or extra crushed cookies right before serving for the best presentation
 Save
Save These have become my go to for bringing comfort to anyone who needs it. Something about that combination of fudgy brownie and creamy cheesecake just makes everything feel better.
Common Questions
- → Can I make these brownie cheesecake cups ahead of time?
-
Absolutely! These actually taste better when made ahead. You can prepare them up to 2 days in advance and store them refrigerated in an airtight container. The chilling time helps the cheesecake layer set properly and allows the flavors to develop. Bring to room temperature for about 15 minutes before serving for the best texture.
- → What other toppings work well with these cups?
-
The possibilities are endless! Try peanut butter chips, toffee bits, shredded coconut, crushed pretzels for a salty-sweet combo, or fresh raspberries. A drizzle of caramel or chocolate sauce over the top takes them to the next level. You can also customize each cup with different toppings for variety.
- → How do I know when the cheesecake cups are done baking?
-
The cheesecake layer should be set but still slightly jiggly in the center—it will firm up as it cools. The brownie edges should look firm and slightly pulled away from the liners. If they're still very liquid after 25 minutes, give them 2-3 more minutes, but be careful not to overbake or the brownie will dry out.
- → Can I freeze these loaded brownie cups?
-
Yes! Once completely cooled, place them in a single layer on a baking sheet and freeze until solid (about 2 hours), then transfer to a freezer-safe container or bag. They'll keep well for up to 3 months. Thaw overnight in the refrigerator before serving. Note that some toppings like Oreos may soften slightly after freezing.
- → Why did my cheesecake layer crack or sink?
-
Overmixing the cheesecake filling can incorporate too much air, leading to cracks. Also, opening the oven door too early or sudden temperature changes can cause sinking. Make sure all ingredients are at room temperature before mixing, and beat just until smooth and combined. The gentle cooling in the pan before transferring also helps prevent cracking.
- → Can I make these gluten-free?
-
Definitely! Simply substitute the all-purpose flour with a reliable 1:1 gluten-free flour blend. The rest of the ingredients—including the cocoa powder, cream cheese, and most toppings—are naturally gluten-free. Just double-check your toppings like Oreos (some brands contain gluten) and ensure your chocolate chips are certified GF if needed.
