 Save
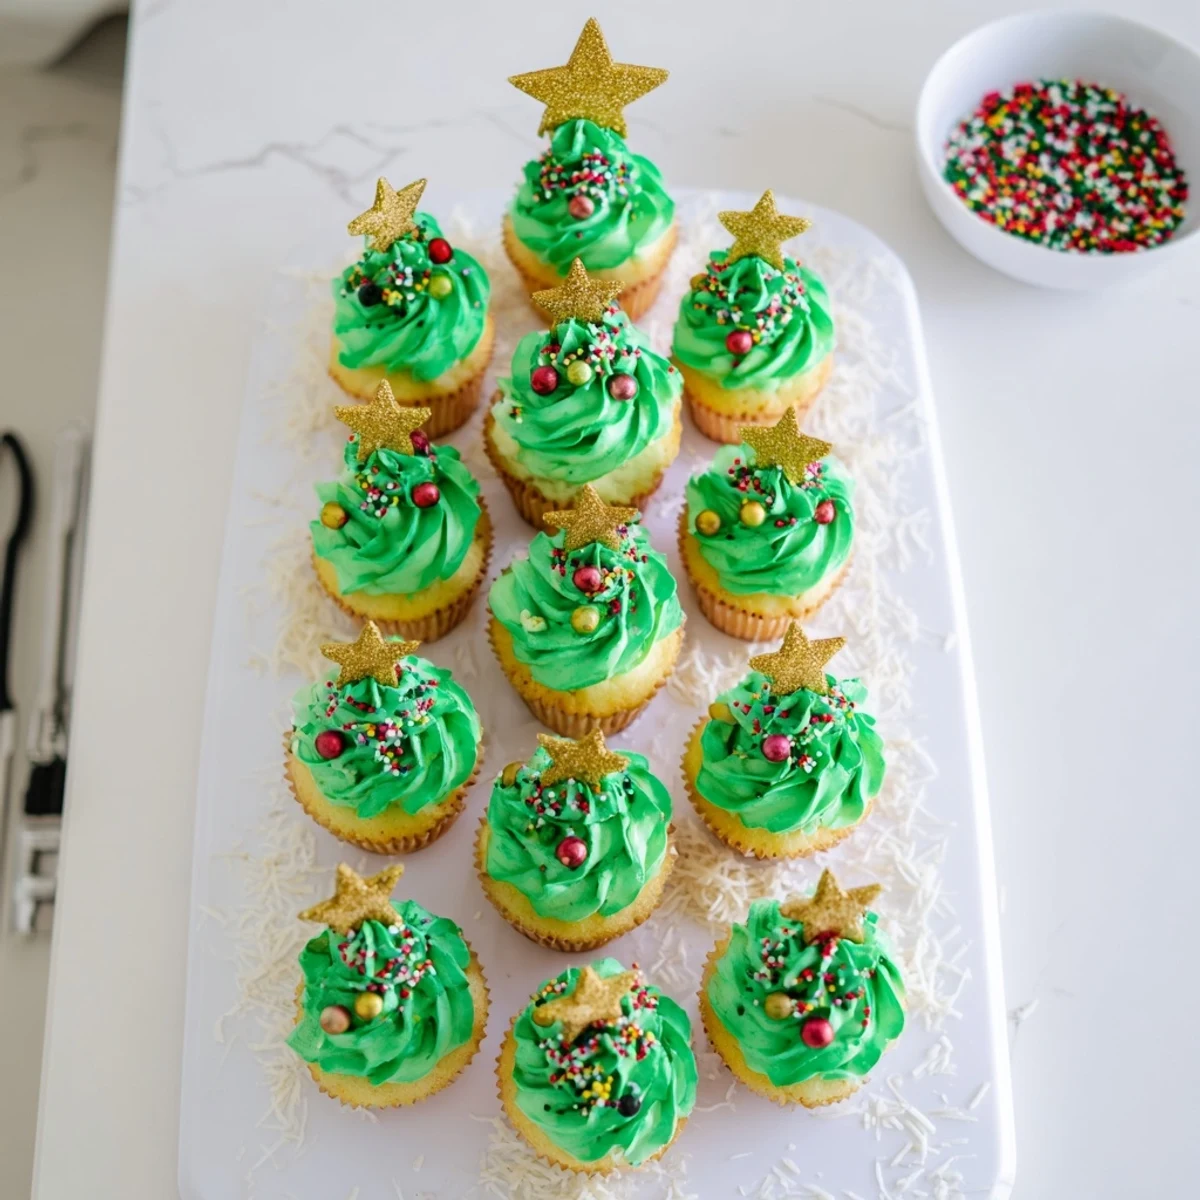
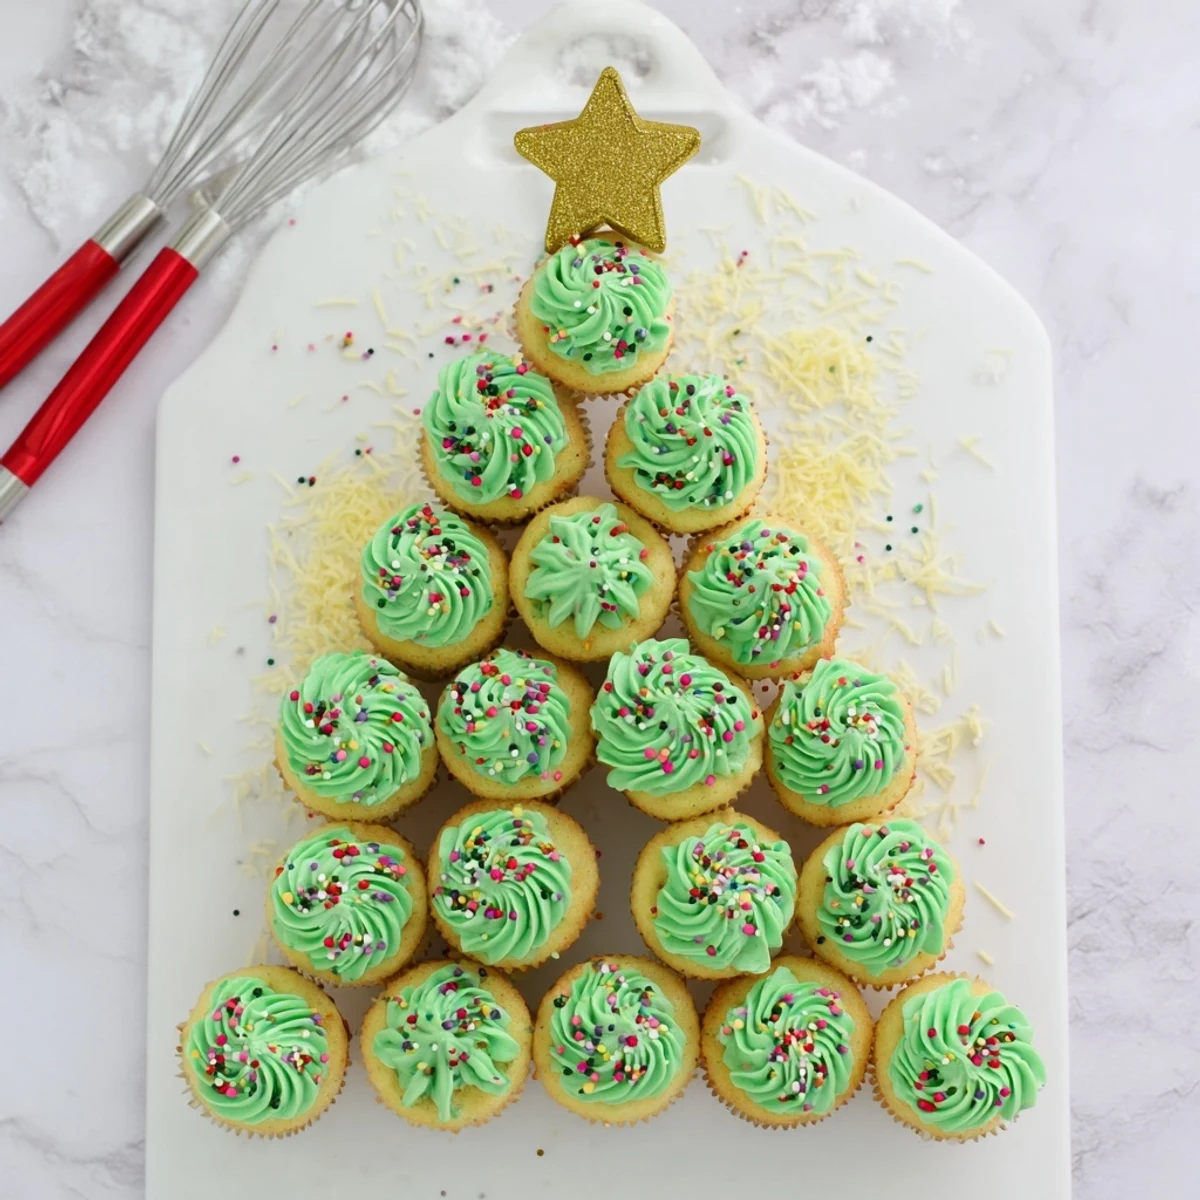
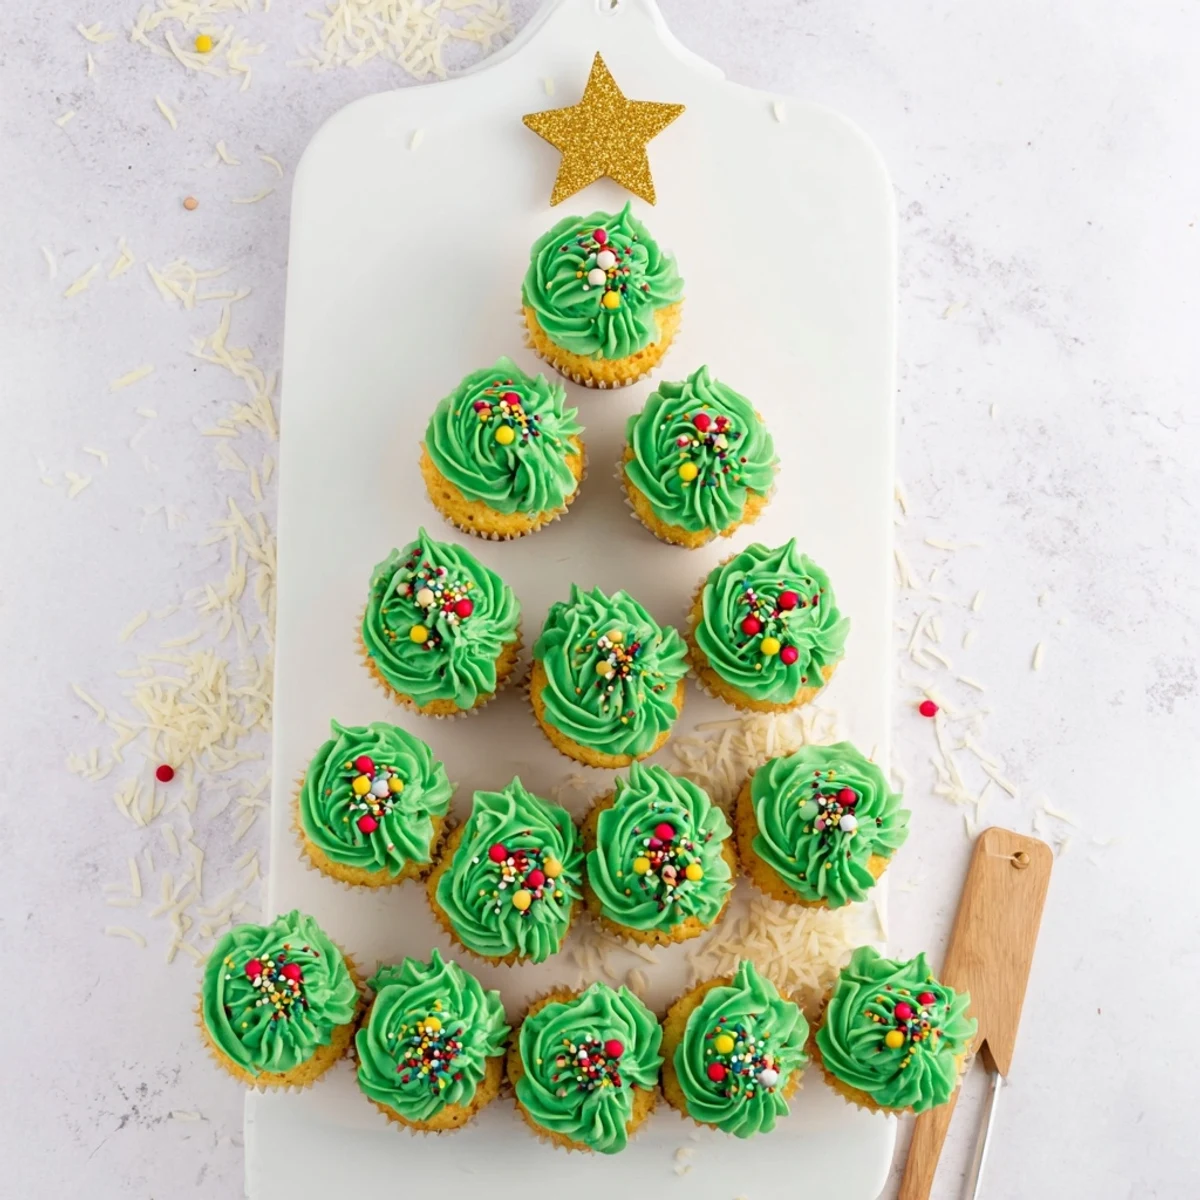
Save Transform ordinary cupcakes into a showstopping holiday centerpiece by arranging them in a triangular tree formation. The project features classic vanilla cupcakes topped with vibrant green buttercream frosting, piped into tall elegant swirls using a star tip. Decorate with multicolored sprinkles as ornaments, add an edible gold star at the peak, and finish with optional snow-like shredded coconut or candy canes for extra festive flair.
The year my daughter turned six, she declared our Christmas celebrations needed more height. She'd seen those towering cupcake trees in a magazine and wouldn't let it go, so we spent a rainy Sunday afternoon covered in green food coloring and flour, discovering that some holiday projects are worth the mess.
Last December, my neighbor's three grandkids helped arrange the branches and somehow turned our careful triangle into a slightly lopsided, utterly charming creation. The photo of them covered in sprinkles and grinning like conspirators now lives on my fridge, better than any pinterest perfect attempt.
Ingredients
- All purpose flour: The foundation of tender, moist cupcakes that hold up under all that festive buttercream
- Baking powder and soda: These work together to give your cupcakes the perfect rise and light texture
- Unsalted butter: Room temperature butter creamed with sugar creates the delicate crumb structure you want
- Granulated sugar: Sweetens and tenderizes while helping create that golden brown top
- Eggs: Bring structure and richness, so use them at room temperature for better emulsification
- Vanilla extract: Pure vanilla makes the difference between good cupcakes and great ones
- Whole milk: Adds moisture and helps create a tender crumb throughout each cupcake
- Butter for frosting: Softened butter whips into that silky base that holds all the sugar
- Powdered sugar: Sifting first prevents lumps and gives you that perfectly smooth buttercream
- Green gel food coloring: Gel colors are more concentrated, so you get vibrant green without thinning the frosting
- Multicolored sprinkles: These become your ornaments, so choose colors that pop against the green
- Edible gold star: The crowning glory that makes your tree feel complete and magical
Instructions
- Preheat your oven:
- Set it to 350°F and line those muffin pans with festive liners while the oven warms up
- Whisk the dry ingredients:
- Combine flour, baking powder, baking soda, and salt in a bowl so they're evenly distributed
- Cream butter and sugar:
- Beat them until light and fluffy, then add eggs one at a time, followed by vanilla
- Combine wet and dry:
- Add flour mixture in three parts, alternating with milk, mixing until just combined
- Bake to perfection:
- Fill liners two thirds full and bake 18 to 20 minutes until a toothpick comes out clean
- Make the buttercream:
- Beat butter until creamy, gradually add powdered sugar, then vanilla and milk until smooth
- Add the magic color:
- Tint the frosting with green gel until it's the perfect Christmas tree shade
- Pipe tall swirls:
- Use a large star tip to create generous swirls that look like fluffy tree branches
- Build your tree:
- Arrange 7 cupcakes at the base, then rows of 6, 5, 4, 2, and 1 at the top to form a triangle
- Decorate:
- Add sprinkles as ornaments and place the gold star at the very peak
 Save
Save My sister attempted this for her office party and forgot the star topper, so she cut one from gold cardboard and stuck it in with a toothpick. Everyone thought it was an intentional crafty touch, which just goes to show that improvisation often looks like creativity.
Building A Stable Foundation
Some years I use a foam cone wrapped in foil and secure cupcakes with toothpicks for rock solid stability. It's especially helpful if you're transporting the tree or have curious pets who might investigate your edible creation.
Making It Snow
A light dusting of shredded coconut over the green buttercream creates the most magical winter effect. It sticks beautifully to the slightly tacky frosting and makes the whole tree look like it was dusted by a gentle snowfall.
Serving Suggestions
This tree deserves to be the star of your dessert table, so give it space and good lighting. Guests will naturally pull cupcakes from the bottom rows first, leaving the top for last, which creates a fun dismantling experience that everyone enjoys watching unfold.
- Set out a small plate and napkins beside the tree for easy serving
- Consider taking a photo before the first branch is claimed
- Offer extra sprinkles on the side for kids who want to add more ornaments
 Save
Save May your holiday season be filled with sticky fingers, colorful sprinkles, and the kind of messy joy that only baking with people you love can create.
Common Questions
- → How do I arrange cupcakes into a tree shape?
-
Start with 7 cupcakes at the base, then stack rows of 6, 5, and 4 cupcakes above. Finish with 2 cupcakes and place 1 at the very top to create a triangular Christmas tree formation on a large serving board or platter.
- → Can I make the cupcakes ahead of time?
-
Yes, bake the cupcakes up to 2 days in advance and store in an airtight container. Prepare the buttercream separately and pipe it fresh before arranging and decorating for best results.
- → What other colors work for this display?
-
While traditional green creates a classic evergreen look, you could use white frosting for a snowy tree effect, or try red frosting for a bold modern twist. The decorating possibilities are endless.
- → How do I transport a cupcake tree safely?
-
Use a sturdy large cutting board or flat platter as your base. For added stability, insert toothpicks between cupcakes or use a foam cone covered in foil as a support structure underneath the arrangement.
- → Can I use boxed cake mix instead?
-
Absolutely. A boxed vanilla cake mix works perfectly for this project. Focus your energy on the buttercream frosting and creative decorating to achieve the same impressive holiday centerpiece.
- → What piping tip creates the best tree texture?
-
A large open star tip (such as Wilton 1M or 2D) creates beautiful textured swirls that mimic pine branches. Hold the bag perpendicular to the cupcake and pipe in a tall, circular motion for maximum height and definition.
