 Save
Save Roasted beef bone marrow offers a rich, buttery flavor perfect as a sophisticated appetizer. The marrow is seasoned simply with sea salt, black pepper, and thyme, then roasted until soft and bubbling. A fresh garnish of parsley, shallot, and lemon juice adds brightness that balances the richness. Serve it hot, scooped onto toasted, crusty bread for textural contrast. This simple yet decadent dish highlights marrow’s natural savor combined with herbal freshness, making it an elegant starter or side for any occasion.
I'll never forget the first time I tasted roasted beef bone marrow at a little bistro tucked away on a quiet Parisian street. The waiter placed those golden, bubbling bones in front of me with such reverence that I knew this wasn't just food—it was an experience. That rich, buttery interior had been transformed by heat into something luxurious and almost decadent, and I scraped every precious bit onto warm toast while my dining companion watched with amusement. From that moment, I was obsessed with recreating that magic in my own kitchen.
I served this dish to my partner on a cold November evening, and I watched their face light up as they scooped that warm marrow onto crispy bread for the first time. They said it tasted like luxury, and honestly, that's exactly what it is—elegant, simple, and made with just four bones and a handful of seasonings. We polished off the entire batch and spent the rest of the evening talking about how something so refined could be so accessible.
Ingredients
- 4 large beef marrow bones (about 3–4 inches long): Ask your butcher to split them lengthwise for you—this makes scooping the marrow so much easier and ensures they roast evenly. I learned this the hard way after struggling with whole bones my first attempt.
- 1 teaspoon sea salt: Don't skip this or be tempted to oversalt; the marrow itself is rich, and a light hand with salt lets its natural flavor shine.
- ½ teaspoon freshly ground black pepper: Fresh ground makes all the difference here—pre-ground pepper tastes flat by comparison.
- 1 teaspoon fresh thyme leaves (or ½ teaspoon dried): Fresh thyme adds an earthy, aromatic quality that elevates this from simple to sophisticated. If you only have dried, use it sparingly since it's more concentrated.
- 1 small bunch fresh parsley, chopped: This bright garnish cuts through the richness beautifully and adds a fresh herbal note that keeps the dish from feeling heavy.
- 1 small shallot, finely diced: The subtle sweetness and gentle bite of shallot complement the buttery marrow perfectly—it's what transforms a simple topping into something memorable.
- 1 teaspoon lemon juice: Just a squeeze adds brightness and helps your palate reset between bites so you can keep enjoying more.
- Crusty bread, toasted (optional): This is where the marrow truly becomes magical—spread onto warm, crispy bread it becomes a complete experience.
Instructions
- Get your oven ready:
- Preheat your oven to 220°C (425°F). While it's heating, line your baking tray with parchment paper or foil—this makes cleanup easier and helps the bones roast evenly without sticking.
- Arrange the bones:
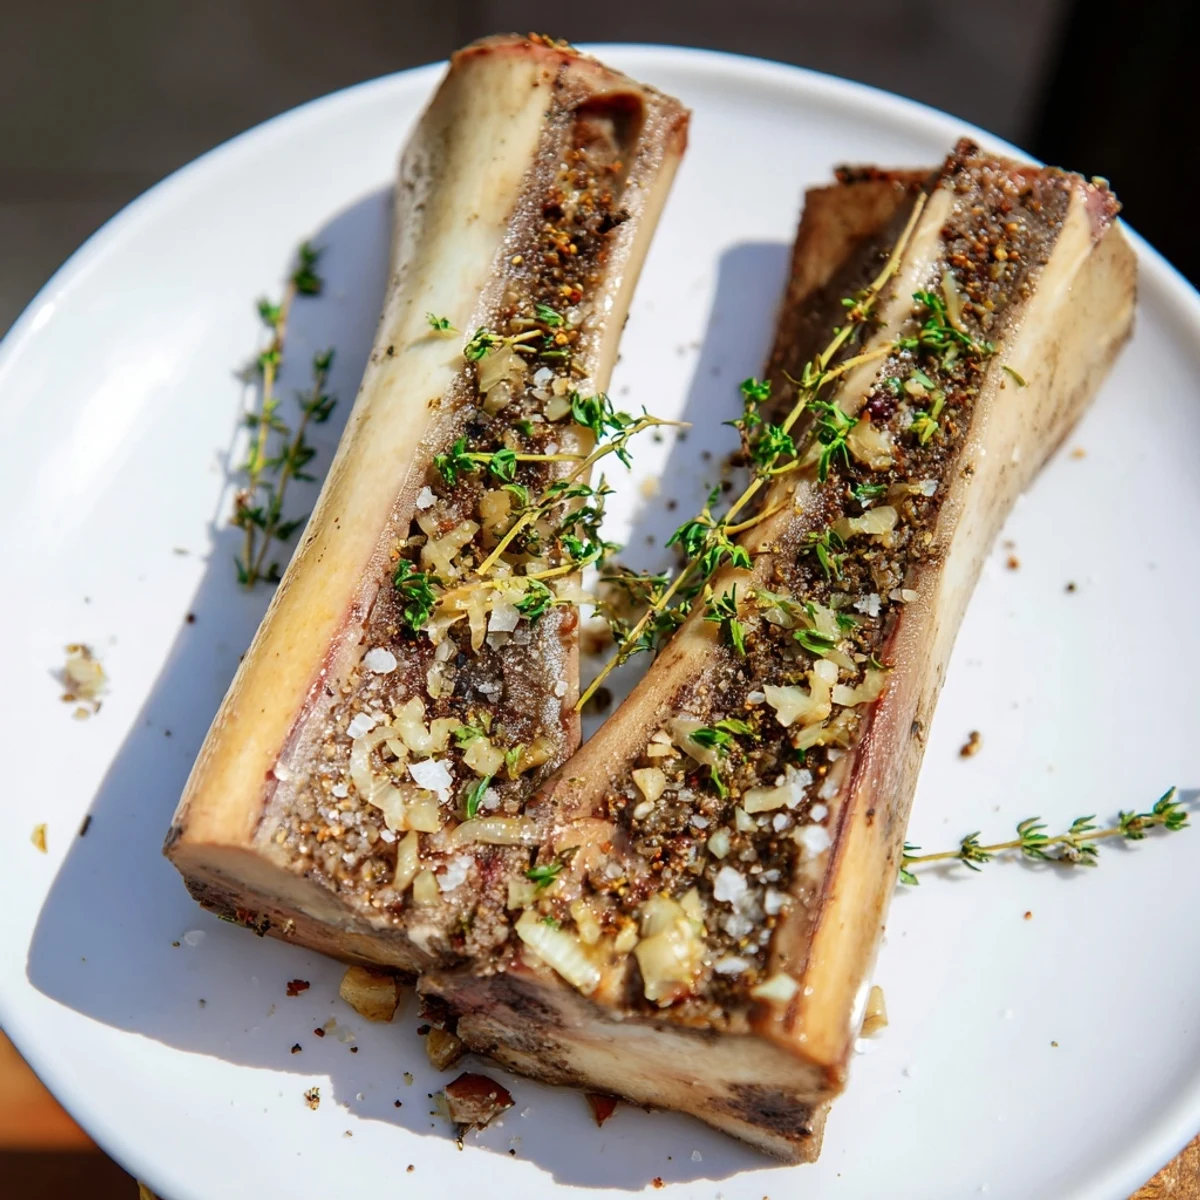
- Place your marrow bones cut side up on the prepared tray. They should be spaced out so the heat can circulate around them. The cut side facing up is crucial—this is where all that gorgeous marrow will bubble and soften.
- Season with care:
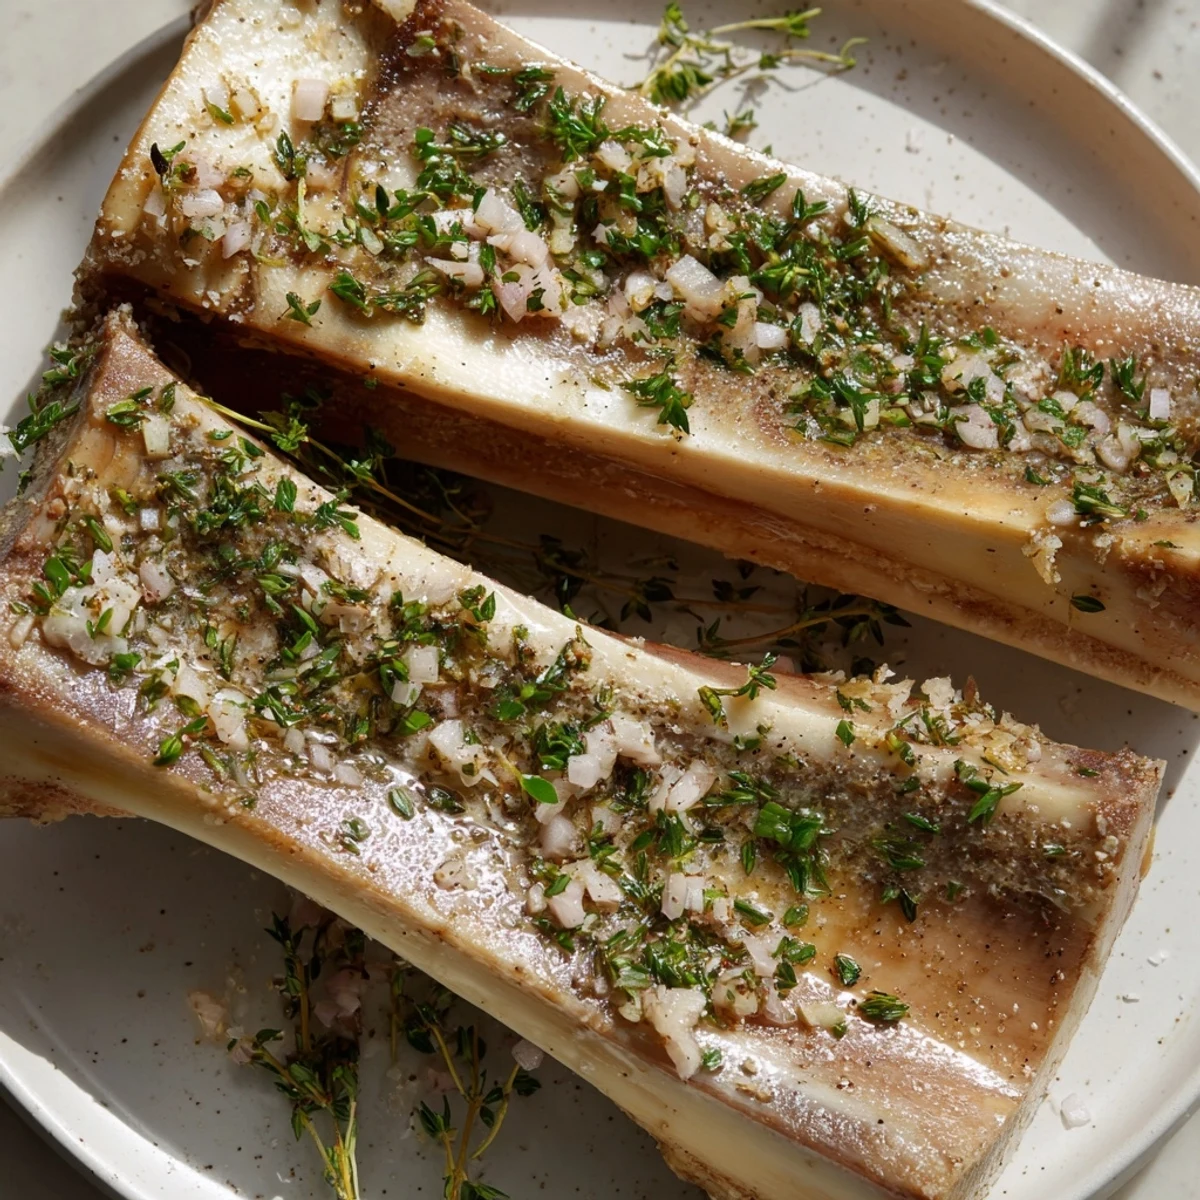
- Sprinkle the sea salt, black pepper, and fresh thyme evenly over the exposed marrow. Don't be shy with the thyme—it infuses the marrow as it roasts and creates this wonderful herbal aroma in your kitchen.
- Roast until golden:
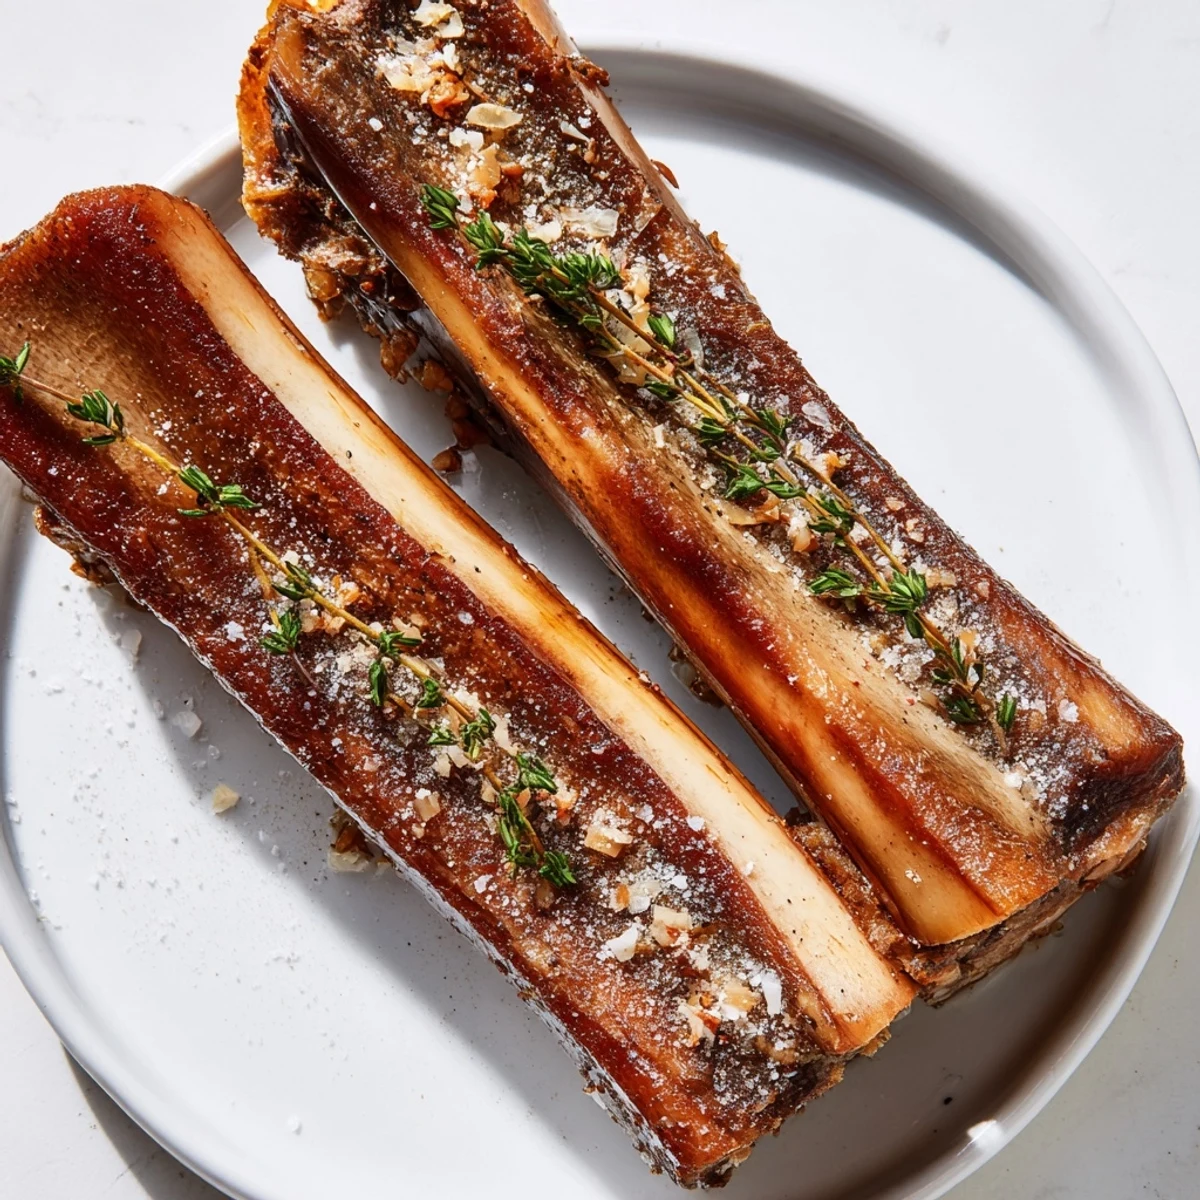
- Slide the tray into your hot oven for 20–25 minutes. You're looking for the marrow to become bubbling and jiggly but not completely melted away. The top should look glossy and slightly browned at the edges. If you peek after 18 minutes, you'll get a sense of how it's progressing.
- Make your garnish:
- While the bones are roasting, combine the chopped parsley, diced shallot, and lemon juice in a small bowl. This mixture is your finishing touch—it brightens everything and adds texture and freshness.
- Cool just enough:
- When the bones come out of the oven, let them rest for 2–3 minutes. This lets them cool just enough to handle comfortably but they'll still be steaming hot—exactly how they should be served.
- Serve and enjoy:
- Top each bone with a generous spoonful of your parsley mixture and serve immediately. If you're using bread, scoop that luxurious marrow onto each bite and experience pure indulgence.
 Save
Save There's something almost ceremonial about serving roasted bone marrow. It's not the kind of dish you eat mindlessly while scrolling—it demands your attention and appreciation. When I served it to my in-laws who'd never tried it before, they were hesitant at first, but one bite changed everything. Suddenly this ingredient they thought was just for stock became their new favorite, and we've made it a tradition ever since.
Choosing and Preparing Your Bones
Building a relationship with your butcher is genuinely one of the best investments you can make as a home cook. I started asking my local butcher about marrow bones almost casually, and now he saves the best ones for me and pre-splits them without me even asking. The bones should be fresh and have a pale pink color when split, never gray or dull. When you get home, keep them cold until you're ready to roast, and don't be afraid to ask questions—a good butcher loves talking about their meat and will steer you right.
The Art of the Perfect Temperature
Getting the roasting temperature right is genuinely the secret to success here. At 220°C, you're hot enough to render the marrow and create that beautiful bubbling effect, but not so hot that it splatters or burns. I've learned that if your kitchen runs cold (older ovens especially), you might need to add a couple of minutes. The most important thing is to look for visual cues—that gentle sizzle and the marrow pulling away slightly from the edges of the bone—rather than blindly trusting the timer.
Serving, Pairing, and Variations
Bone marrow is wonderfully versatile, and once you master the basic roast, you'll find yourself reaching for these bones for all sorts of occasions. Pair it with a crisp white wine like Sauvignon Blanc, or go French and choose a light Pinot Noir that won't overpower the delicate richness. For a garlic lover's twist, rub your toasted bread with a cut clove of garlic before serving. If you want to play with the garnish, try swapping parsley for fresh chives for a more delicate onion note, or use tarragon for something more elegantly herbaceous. You could even try a combination of herbs—thyme, rosemary, and oregano create a more Mediterranean vibe. The marrow itself stays the same, but these small changes let you explore different flavor worlds with the same base ingredient.
- Toast your bread in the oven while the bones roast so everything finishes at the same time and you can serve at peak temperature.
- If you're serving this as part of a larger meal, one bone per person is perfect as an appetizer, but two bones might be needed if it's the main event.
- Leftover roasted marrow can be spooned into a container and refrigerated for up to two days—warm it gently in the oven and it tastes nearly as good as fresh.
 Save
Save This simple dish taught me that some of the most elegant food requires the fewest ingredients and the most attention. It's become my go-to when I want to feel fancy without spending hours in the kitchen.
Common Questions
- → What cut of bone is best for roasting marrow?
-
Large beef marrow bones, preferably 3-4 inches long and split lengthwise, are ideal. This exposes the marrow for even roasting and easy serving.
- → How do you know when marrow is perfectly cooked?
-
Roast until the marrow is soft, bubbling, and slightly pulling away from the bone edges without melting completely, usually around 20-25 minutes at 220°C (425°F).
- → What herbs complement the marrow best?
-
Fresh thyme, parsley, and shallots add brightness and herbal notes that cut through marrow’s richness beautifully.
- → Can marrow be served without bread?
-
Yes, it can be enjoyed on its own or paired with a simple salad, but crusty toasted bread adds a pleasant crunch and helps scoop the marrow.
- → Any tips for preparing marrow bones for roasting?
-
Ask your butcher to split the bones lengthwise for optimal access, and season them generously with salt, pepper, and thyme before roasting.
